Articles and Blog Posts
Lessons Learned on the MABDR
Blog Post March 2022

Obstacles along the way
August of 2020, while most the of world was hunkered down in the safety of their homes, I took to the road. I live on the road much of the time, so this was not a weird thing for me to do. I have a self-contained living space on the back of my F150 and an enclosed trailer with my bikes. I am often exploring the country while I am traveling from one training gig to another. 2020 was a little different because all but one event was cancelled due to Covid. The one event that was able to safely carry on was the Touratech Dirt Daze in Haverhill, NH. Since everything else on my calendar got cancelled, I had time on my hands, so I drove across country for the event.
My plan was to attend Dirt Daze and then ride both the MABDR and NEBDRs. I rode the MABDR solo, with exception to a few days where a friend was able to join me. I’m always encouraging other ADV riders to ride with a buddy, but I couldn’t get anyone to join me for the entire route, so I made the decision to adventure on with it in mind that I was out there alone. This meant that I would make good decisions, keep the speeds low due to wildlife and to not ride any part of the route that I didn’t think I could pass safely. That meant, I was willing to go on the route knowing I very well may have to turn around if the route was too sketchy. I also went into it knowing that the MABDR is a very mellow route and carried a Garmin EnReach just in case.
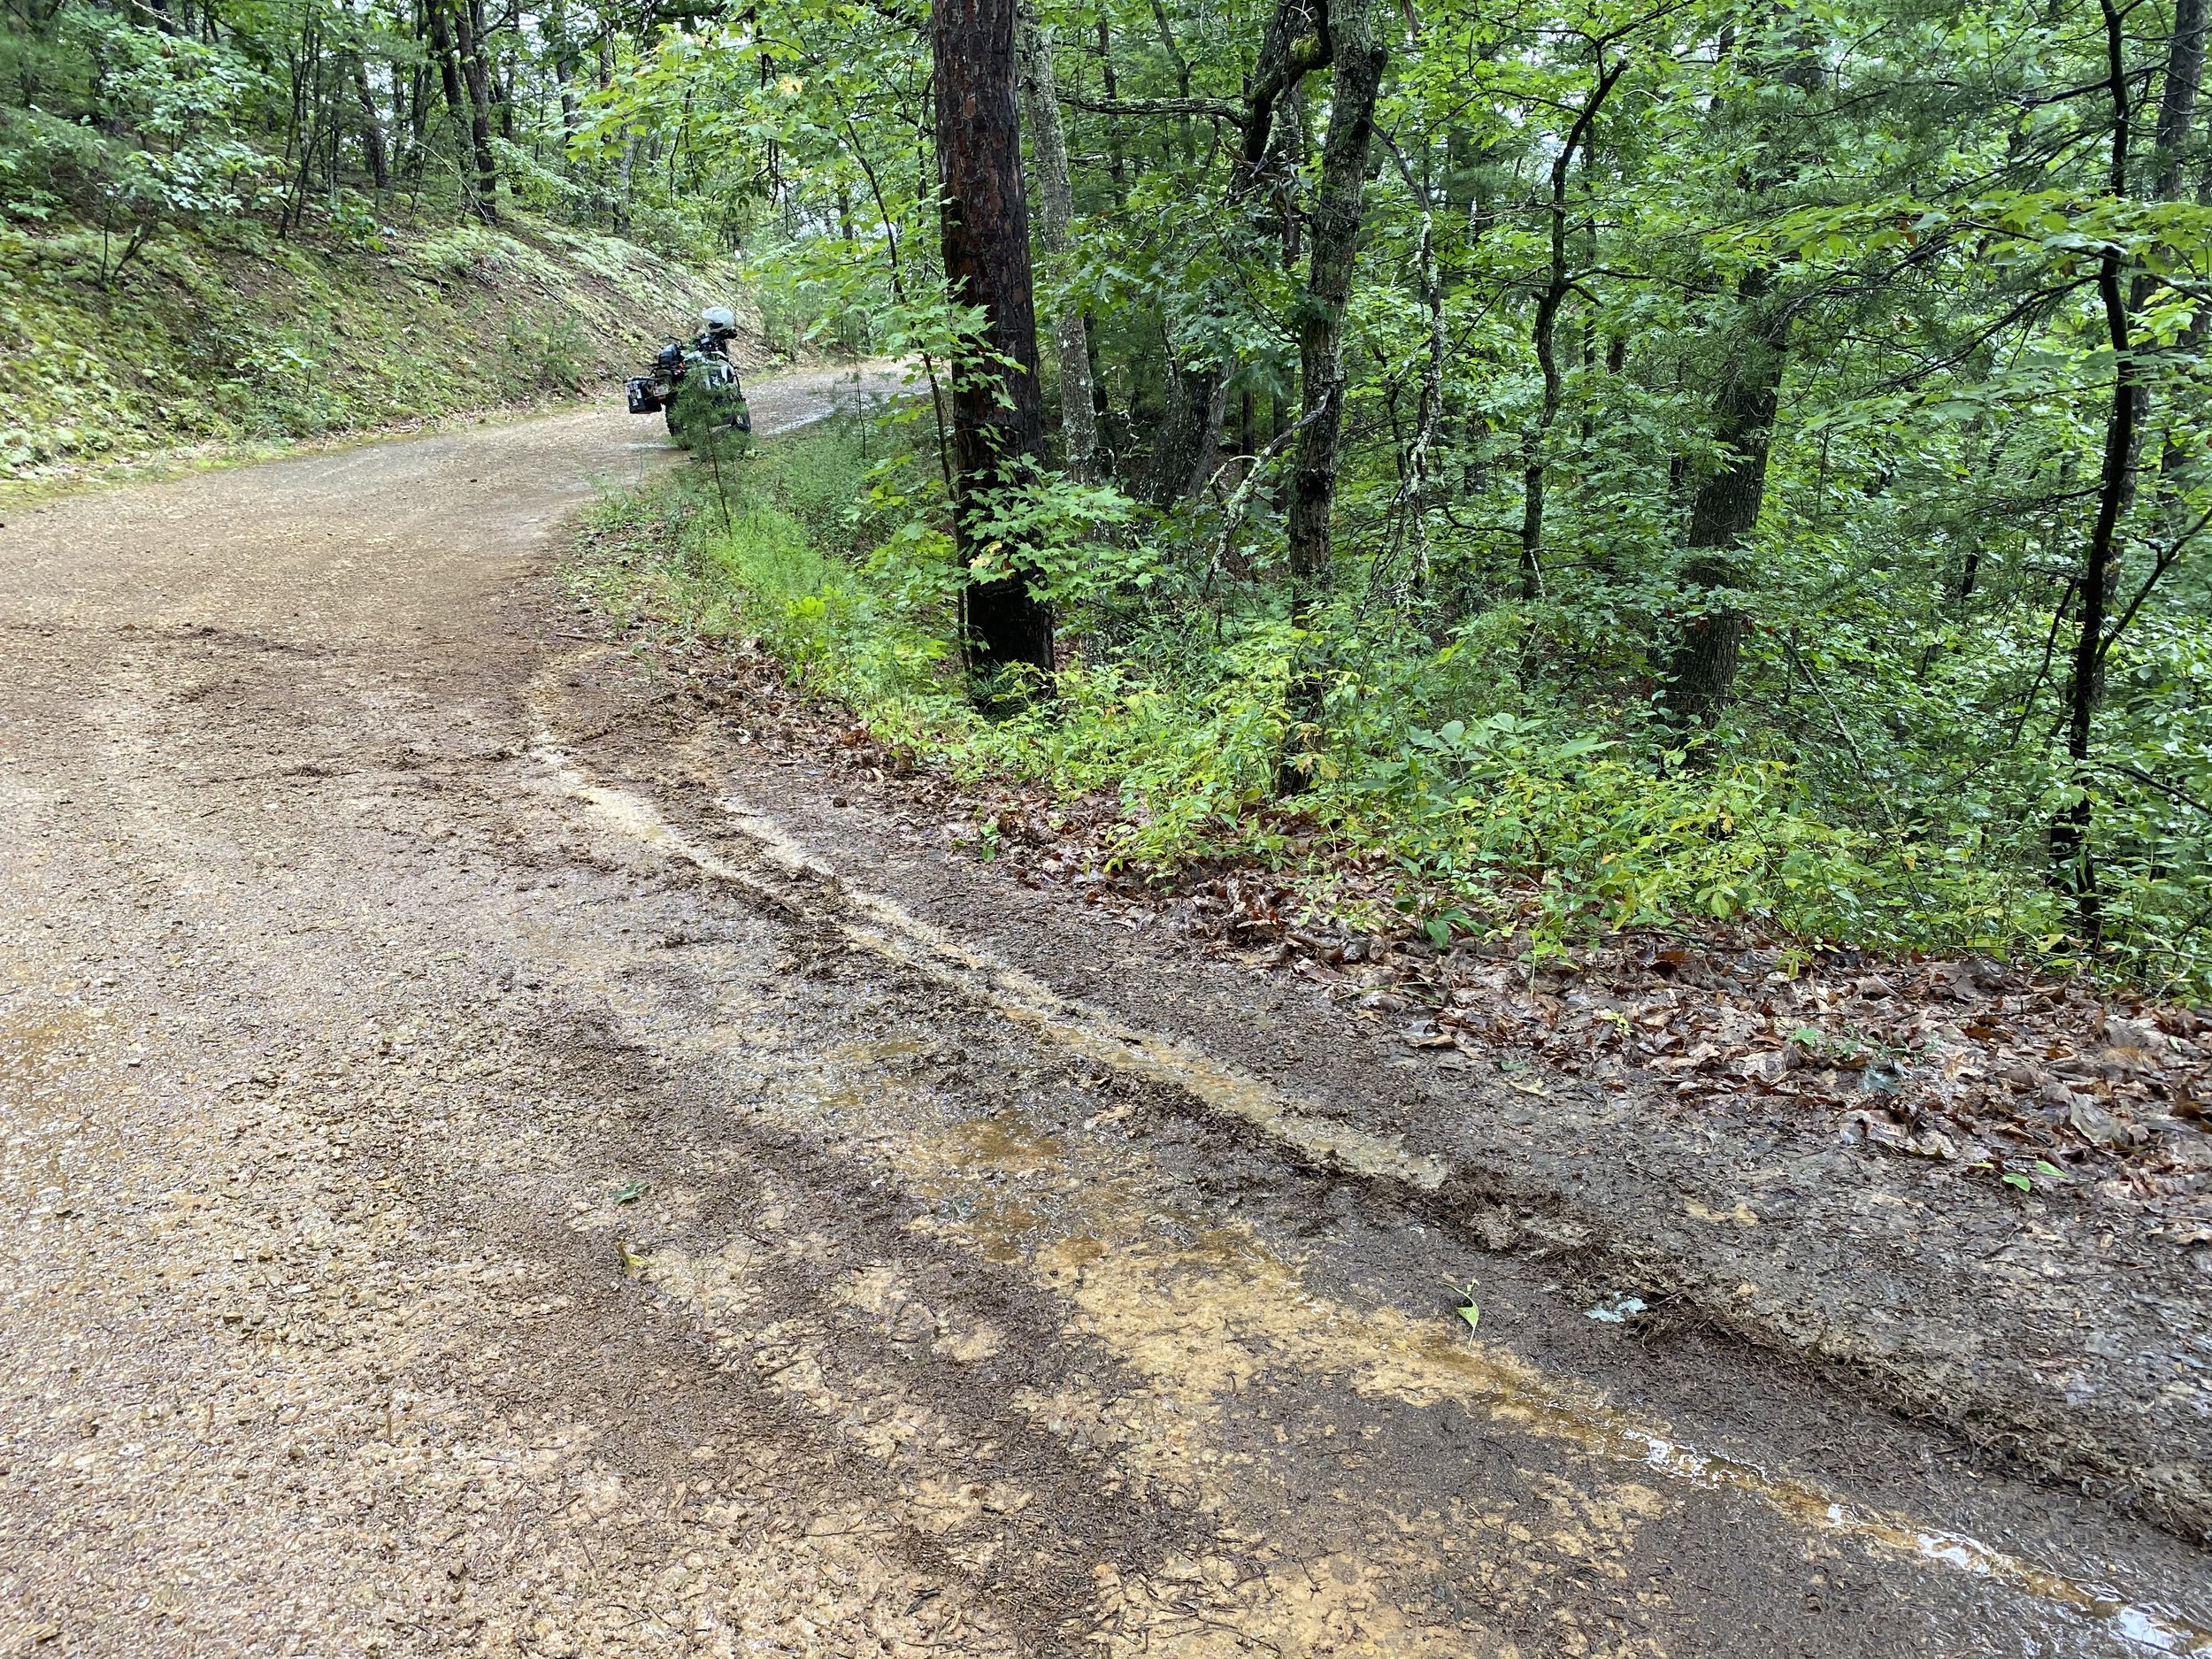
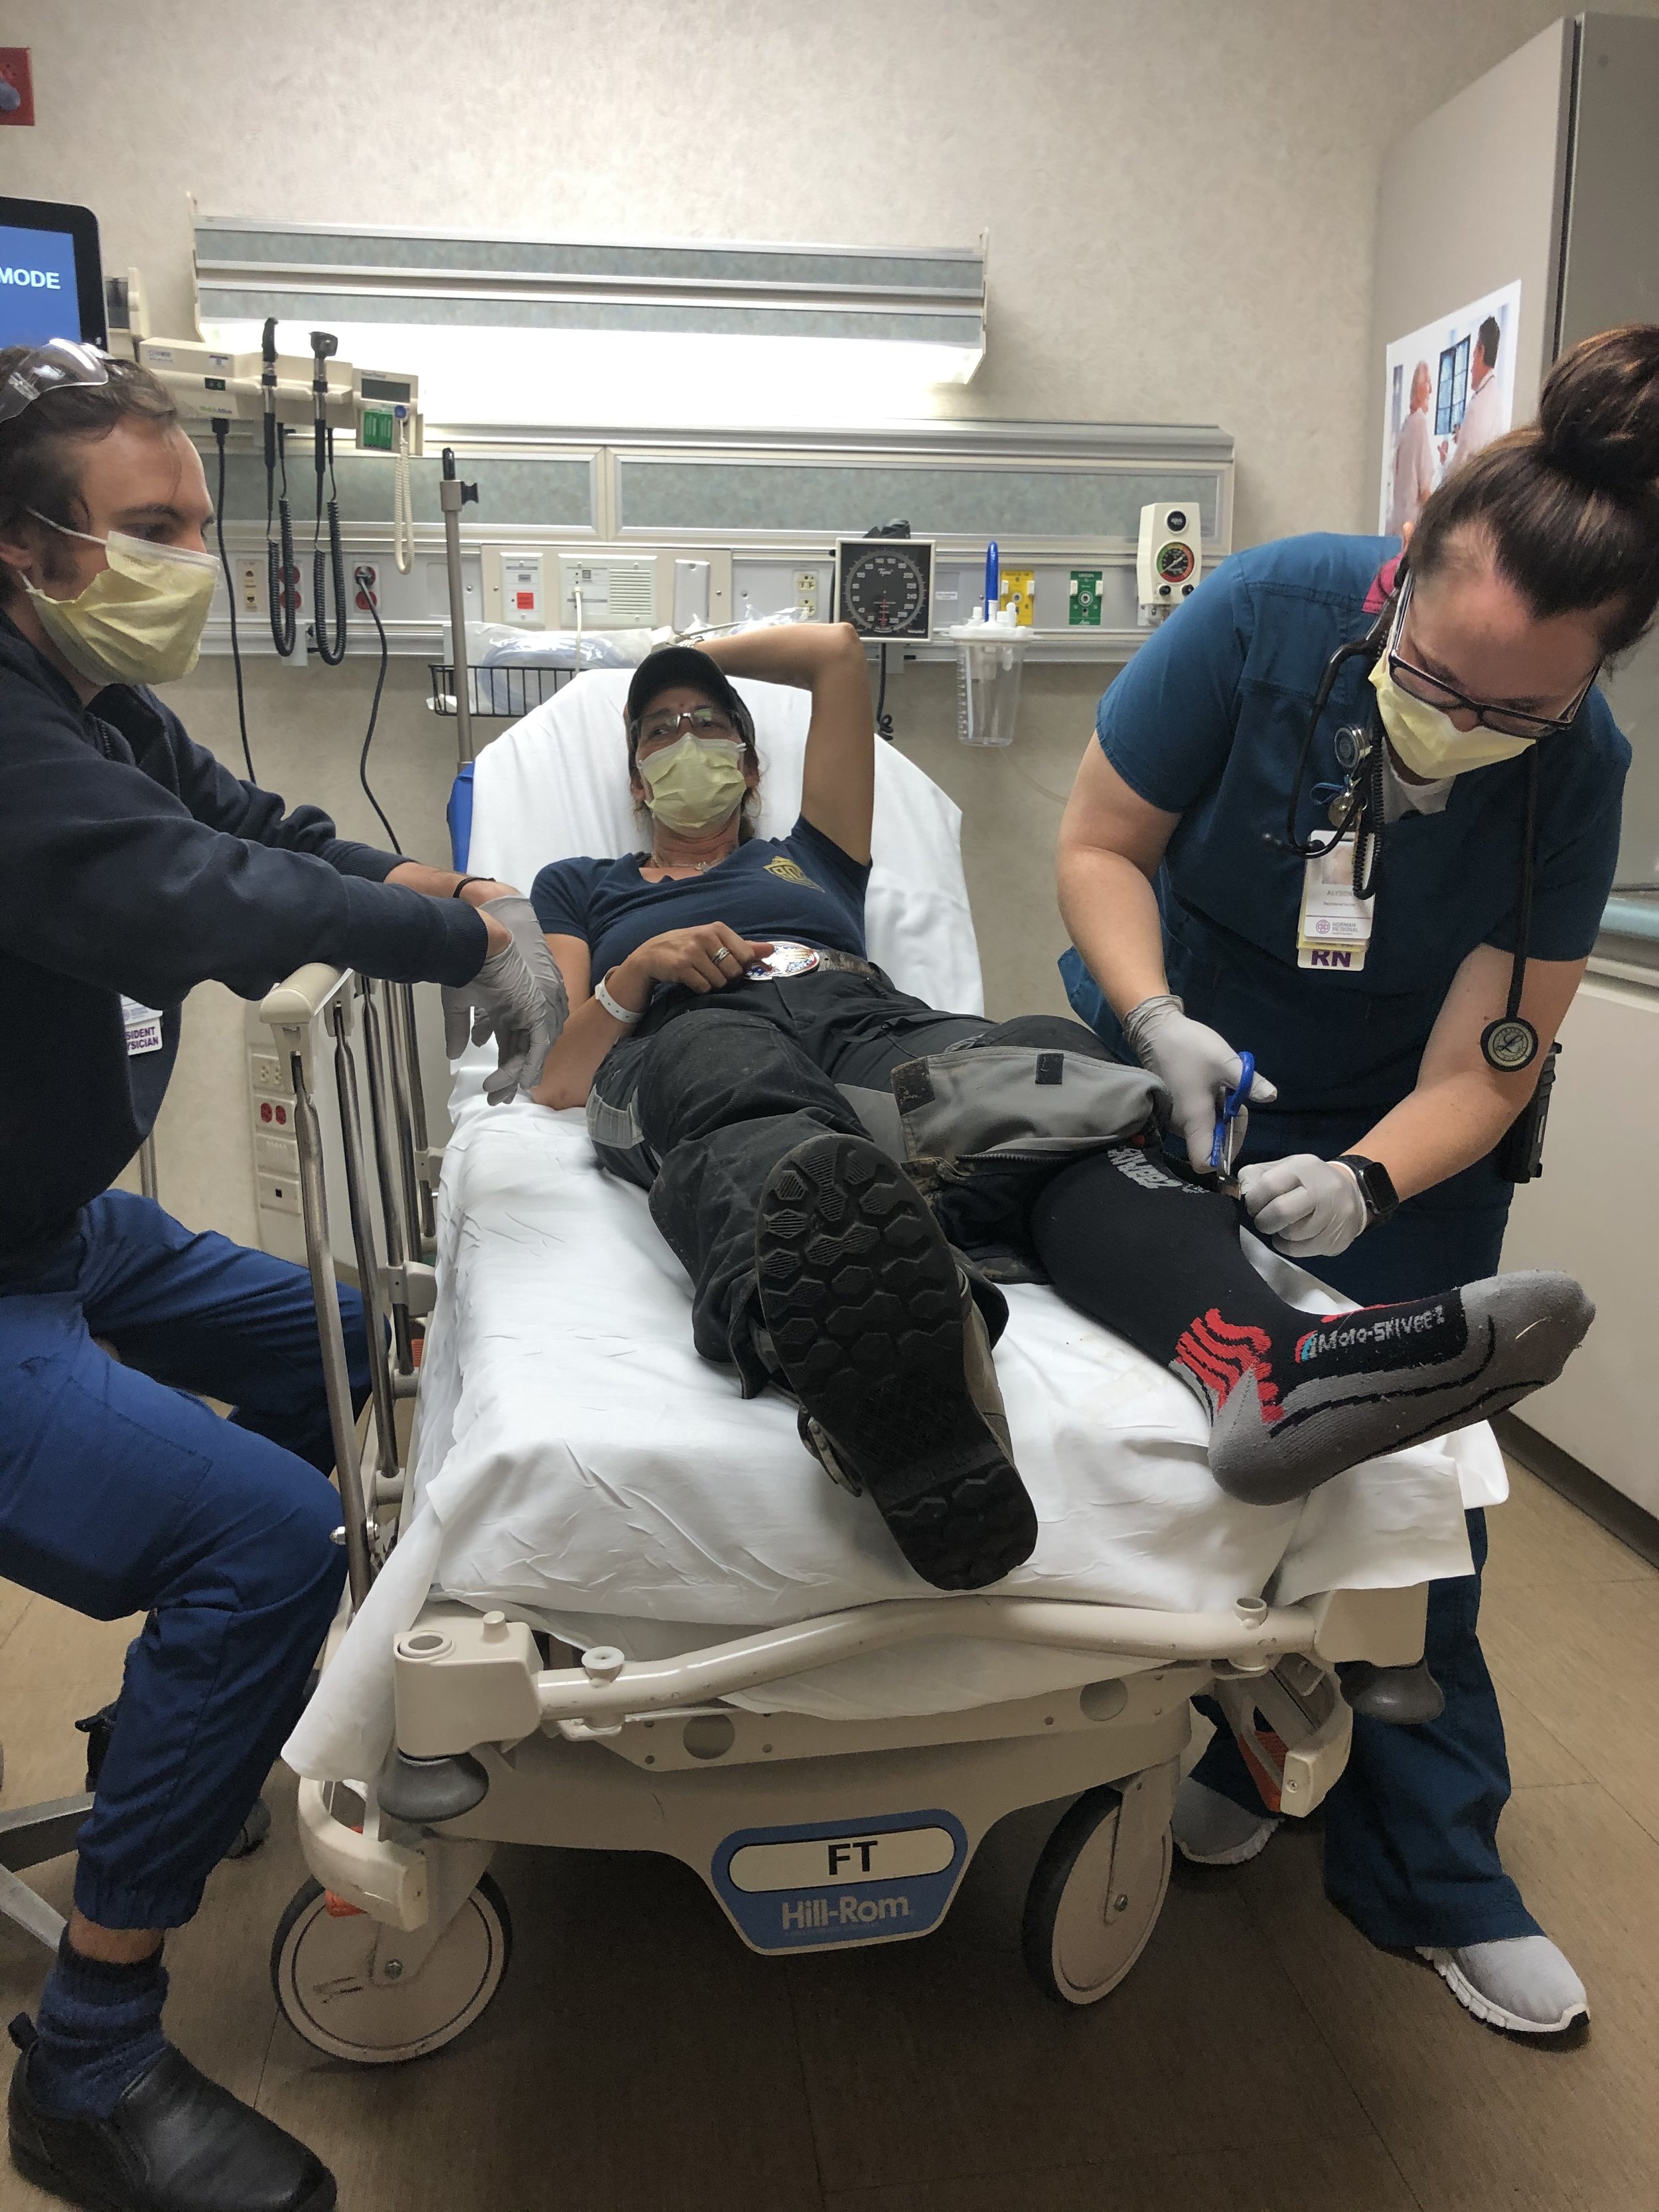
Let’s get into the reason for this blog post. A few days into being on the MABDR, I had to abandon the route due to heavy thunderstorms and took cover at my friend Marjorie’s place in Finksburg, MD. Marjorie was planning on joining me for 3-4 days, but due to the storms we were delayed a day. When it storms on the east coast, the skies open up and you better take cover because it does not mess around. It finally cleared up and we set out on the route. The second day on the route, the rains came back and at some point, we stopped for lunch, and we made the discussion to find a hotel and hunker down for the remaining of the day. We had about 30 miles to ride where we could do just that. Back on route, we were having a ball. We stopped to checked in with each other and we were both good with the rainy conditions and because we were having so much fun, we decided to continue the route. That decision proved to be a bad one. Roughly 30 miles from Brandywine, WV, I hit a snotty patch and off the road I went! And just like that, with the bat of an eye, I was on my back leaning against a tree after taking flight like Wonder Woman and landing headfirst into the “softish” bank. Max, my BMW GS flipped flopped her way like a gymnast and come to rest next to a tree as well. I just laid there assessing what I was feeling and saw that Marjorie had gotten stopped and was heading my way. I yelled out, “Stop, I’m ok, but we need to get this on camera.” Lol. So, she went back and captured the scene. Yes, that is how I roll. Now, I feel you all can learn from another hard, expensive lesson of mine. Thankfully, I was uninjured, but Max was another story.

A scene you really don’t want to have… ever!
I could go into great detail on how the heck we got out of this situation and how Marjorie had to ride me 2up, which she had never ridden 2up before, especially off road with very snotty, wet conditions, rocks with switchbacks as we climbed up and over Heavener Mountain, but I want to get into the part where there is something to learn from all this mess. One thing I did tell Marjorie that might help one of you is the fact that I told her, “I am just luggage, and I wouldn’t move at all.” She said, “I can do that,” and off we went. The short of it was we got into town, waved down a Sheriff, who rounded us up a tow truck and the 4 of us went back to retrieve my bike.

My first squad car experience.

Bowers Garage to the rescue!
Now, let’s look into why I flow through the air like Wonder Woman in the first place. I mentioned it had been raining all day long and we were off road, right? Even though we were keeping our speeds down so we could manage traction, it just didn’t take much to have the front tire slide out as I was approaching a corner. The front slid out a bit and unfortunately, I failed to remove my Crampbuster. When the front tire slid out, my reflex was to tightened up my grip in response and hit the Crampbuster. And just like that, I was transported into Wonder Women’s horse Pegasus, who promptly bucked me off. It happened so fast there wasn’t a damn thing I could do about it. Lesson #1, do not ride with anything on your throttle while riding off road and know that if you choose to ride with it on the street, there could still be consequences. Lesson #2, it doesn’t matter how careful you are being, if you are riding in wet, slippery conditions, you are increasing the likely hood of crashing. Wet conditions on pavement, nice gravel roads where there is no mud, is much different then riding on a road that has variable conditions that includes patches of snotty mud.

Imagine from Google. Goes on your throttle as an assistant.
Terrible line choice.

Riding right is not always the best thing. When you have a good line of sight, move to the better position on the road.
This takes me to a more recent trip where I was leading a group of riders through the Montezuma Canyon after it had snowed a lot and was now melting and making the roads very unpredictable with snotty mud patches. So, knowing what I know about how traction can change in the blink of the eye, I kept our speeds WAY down. It was painfully slow! When I could see very clearly that traction was better, I sped up a bit. If I was unsure or it was clear that traction wasn’t so good, I slowed down, WAY down. This part of the route took us about 1 hour longer than expected due to the conditions, but no one went down and that was my goal, to get everyone back uninjured and no damage to any of the bikes. Well, at the end of the day, one of the riders came up to me and said something like, “Wow, you had a lot of courage to continue on that road because it was very clear that you were afraid.” I said, “No, I wasn’t afraid, I was managing the risk of any of us going down.” He said, “Well, there were times we had good traction.” And I said, “And that’s when I sped up.” What riders don’t realize is that they should slow to speeds that allow them to see that conditions have changed and to be able to get to the appropriate speed prior to getting into such a snotty condition. Riders are crashing all the time because they just don’t realize the need to slow down at times, especially off-road. All it takes is a millisecond and you are down. I know, had I not been there, that rider would have definitely gone down at some point that day. He proved that the following week when he was off by himself and crashed hard in some solid ruts, where he bruised his ribs pretty good and had to take a day or so off from his riding vacation. Afterwards, I asked him how fast was he going? He said that he was going really slow, only 35 MPH. 35 MPH in solid, deep ruts is WAY TOO FAST! So, of course he crashed. When you are riding in deep, hard ruts you should be going just fast enough to have some momentum to get through the ruts. This could mean 5 MPH depending on conditions. The speeds I go, are the speeds I’m willing to crash. Think about this, when you double your speeds, you not only double the impact force, you actually quadruple the impact forces. Now, would you rather crash at 5 MPH or 35 MPH? Had he been going much slower; he may not have crashed, and he probably won’t have gotten as hurt as he did.

Photo from the trip, but not from Montezuma Canyon.
Back to the MABDR scene… the tow truck driver wanted to just hook onto the front tire and drag the bike up on its side. “What the heck?!” “Ah, no, we will stand the bike upright and then pull it up.” The drive said, “Why, that bike is totaled.” And I said, “No, it’s not, it’s a BMW!” Yes, I’m confident with the BMWs! So, we righted the bike and pulled it up to the road. Lesson #3, don’t pull on the front end where the tire can’t rotate. This action might be the reason I started having trouble with my front forks. Not sure about that, but there was no reason to do it this way. Instead, use a tow strap and go to the pegs and pull from there. This will allow the bike to roll easily and not create a lot of tension to the front forks. My front fork issue could also be from the 65,000 miles on the bike and the forks not being properly serviced, unbeknownst to me.

Not ideal pulling point, go to the pegs instead.
Now, I always encourage riders to ride with a buddy because you just never know, and I was definitely grateful to have Marjorie with me that day. Had I been out there by myself, it was going to be a loooooong recovery situation, especially if I didn’t have an Enreach, which by the way I do carry one for this very reason. However, had I still been on the route by myself, I would not have continued on the route with the conditions the way they were. Absolutely not! But, with a buddy… ok, why not? Lesson #4, with or without a buddy, when the conditions are sketchy, as in wet mixed with snotty mud, choose to either park it or take to the pavement. Why chance it? This mistake cost me $2,700 worth of damage to the bike (basically totaled the bike because it wasn’t worth fixing, but I mixed her anyways), I had to replace my helmet, (another $400), a night in a hotel, the tow truck bill ($200), gas money for a friend to drive several hours to come get us and worse, it ended our trip. Was it worth it? Is it ever worth it? It almost always comes down to choices and consequences. We left Brandywine and headed straight to Bob’s BMW in Jessup, MD to drop off Max. The cost doesn’t stop there. I was supposed to meet up north to pre-ride the NEBDR and now I had no bike. So, what do we ADVers do? We have friends who will loan out their bikes so we can venture on. Marjorie’s very good friend, Lisa, who is now my friend, was very generous and loaned me her BMW 800GS and I rode north as planned on the borrowed bike.

The bike I borrowed from Lisa, BMW F800GS.
So, I’m headed north to go ride the NEBDR on a borrowed bike and in route, it’s pouring cats and dogs on the Interstate, and I see I can get some cover from an overpass where I can wait out the downpour as I was finding it very hard to see with the hard rains on top of the water that the other vehicles, especially the semis were throwing my way. As it often goes in the NE, it pours and then it will let up enough to get back out there, so off I go. Or so I thought… the bike won’t start! Battery was dead. (No, I did not leave the key on). Good thing I always carry a battery jumper and a tool bag. Still not a quick and easy thing to deal with. It takes a bit to remove the cover to the battery and then replace the cover, especially if you have to keep jumping the bike every time you turn it off. Lesson #5, make sure the bike is in excellent working order. My friend said the bike was “just serviced.” Well, after looking at her paperwork, she found out “just serviced” really meant 2 years ago. Lol! Life flies when you’re having fun and Lisa has been having fun! After getting the bike going and spending a very long day in rainy conditions, I stopped for a good night’s sleep at a hotel along the way. While trying to park the bike and getting the very tall kickstand down (I call the side stand a kickstand because I always kick it forward to ensure that it’s fully extended), I managed to gently drop the bike. Yes, gently. Good grief, great ending to a challenging day! Not!

Ran for cover!

A tool to always carry.
The next morning, I was loaded and ready to go, or so I thought… As I rode across the parking lot, there was something wrong with the steering. After investigating, I found that the bar risers were lose and had shifted after me gently dropping the bike. This is going to take a minute, so I found some shade because now it’s super-hot and humid out. I dig out my CruzTools and got to work. The bolts were very difficult to get to for me to ensure they got tightened down properly, so I removed the bar risers all together. After some time, I was back on the road. Lesson #6, do your own pre-ride maintenance check. I’m not sure that I would have detected the lose bolts on the bars, but at least look the bike over well, especially if it’s an unfamiliar bike and when there is an added items like bar risers, why not double check that they are indeed tight. I took it for granted that the bike had “just been serviced.”
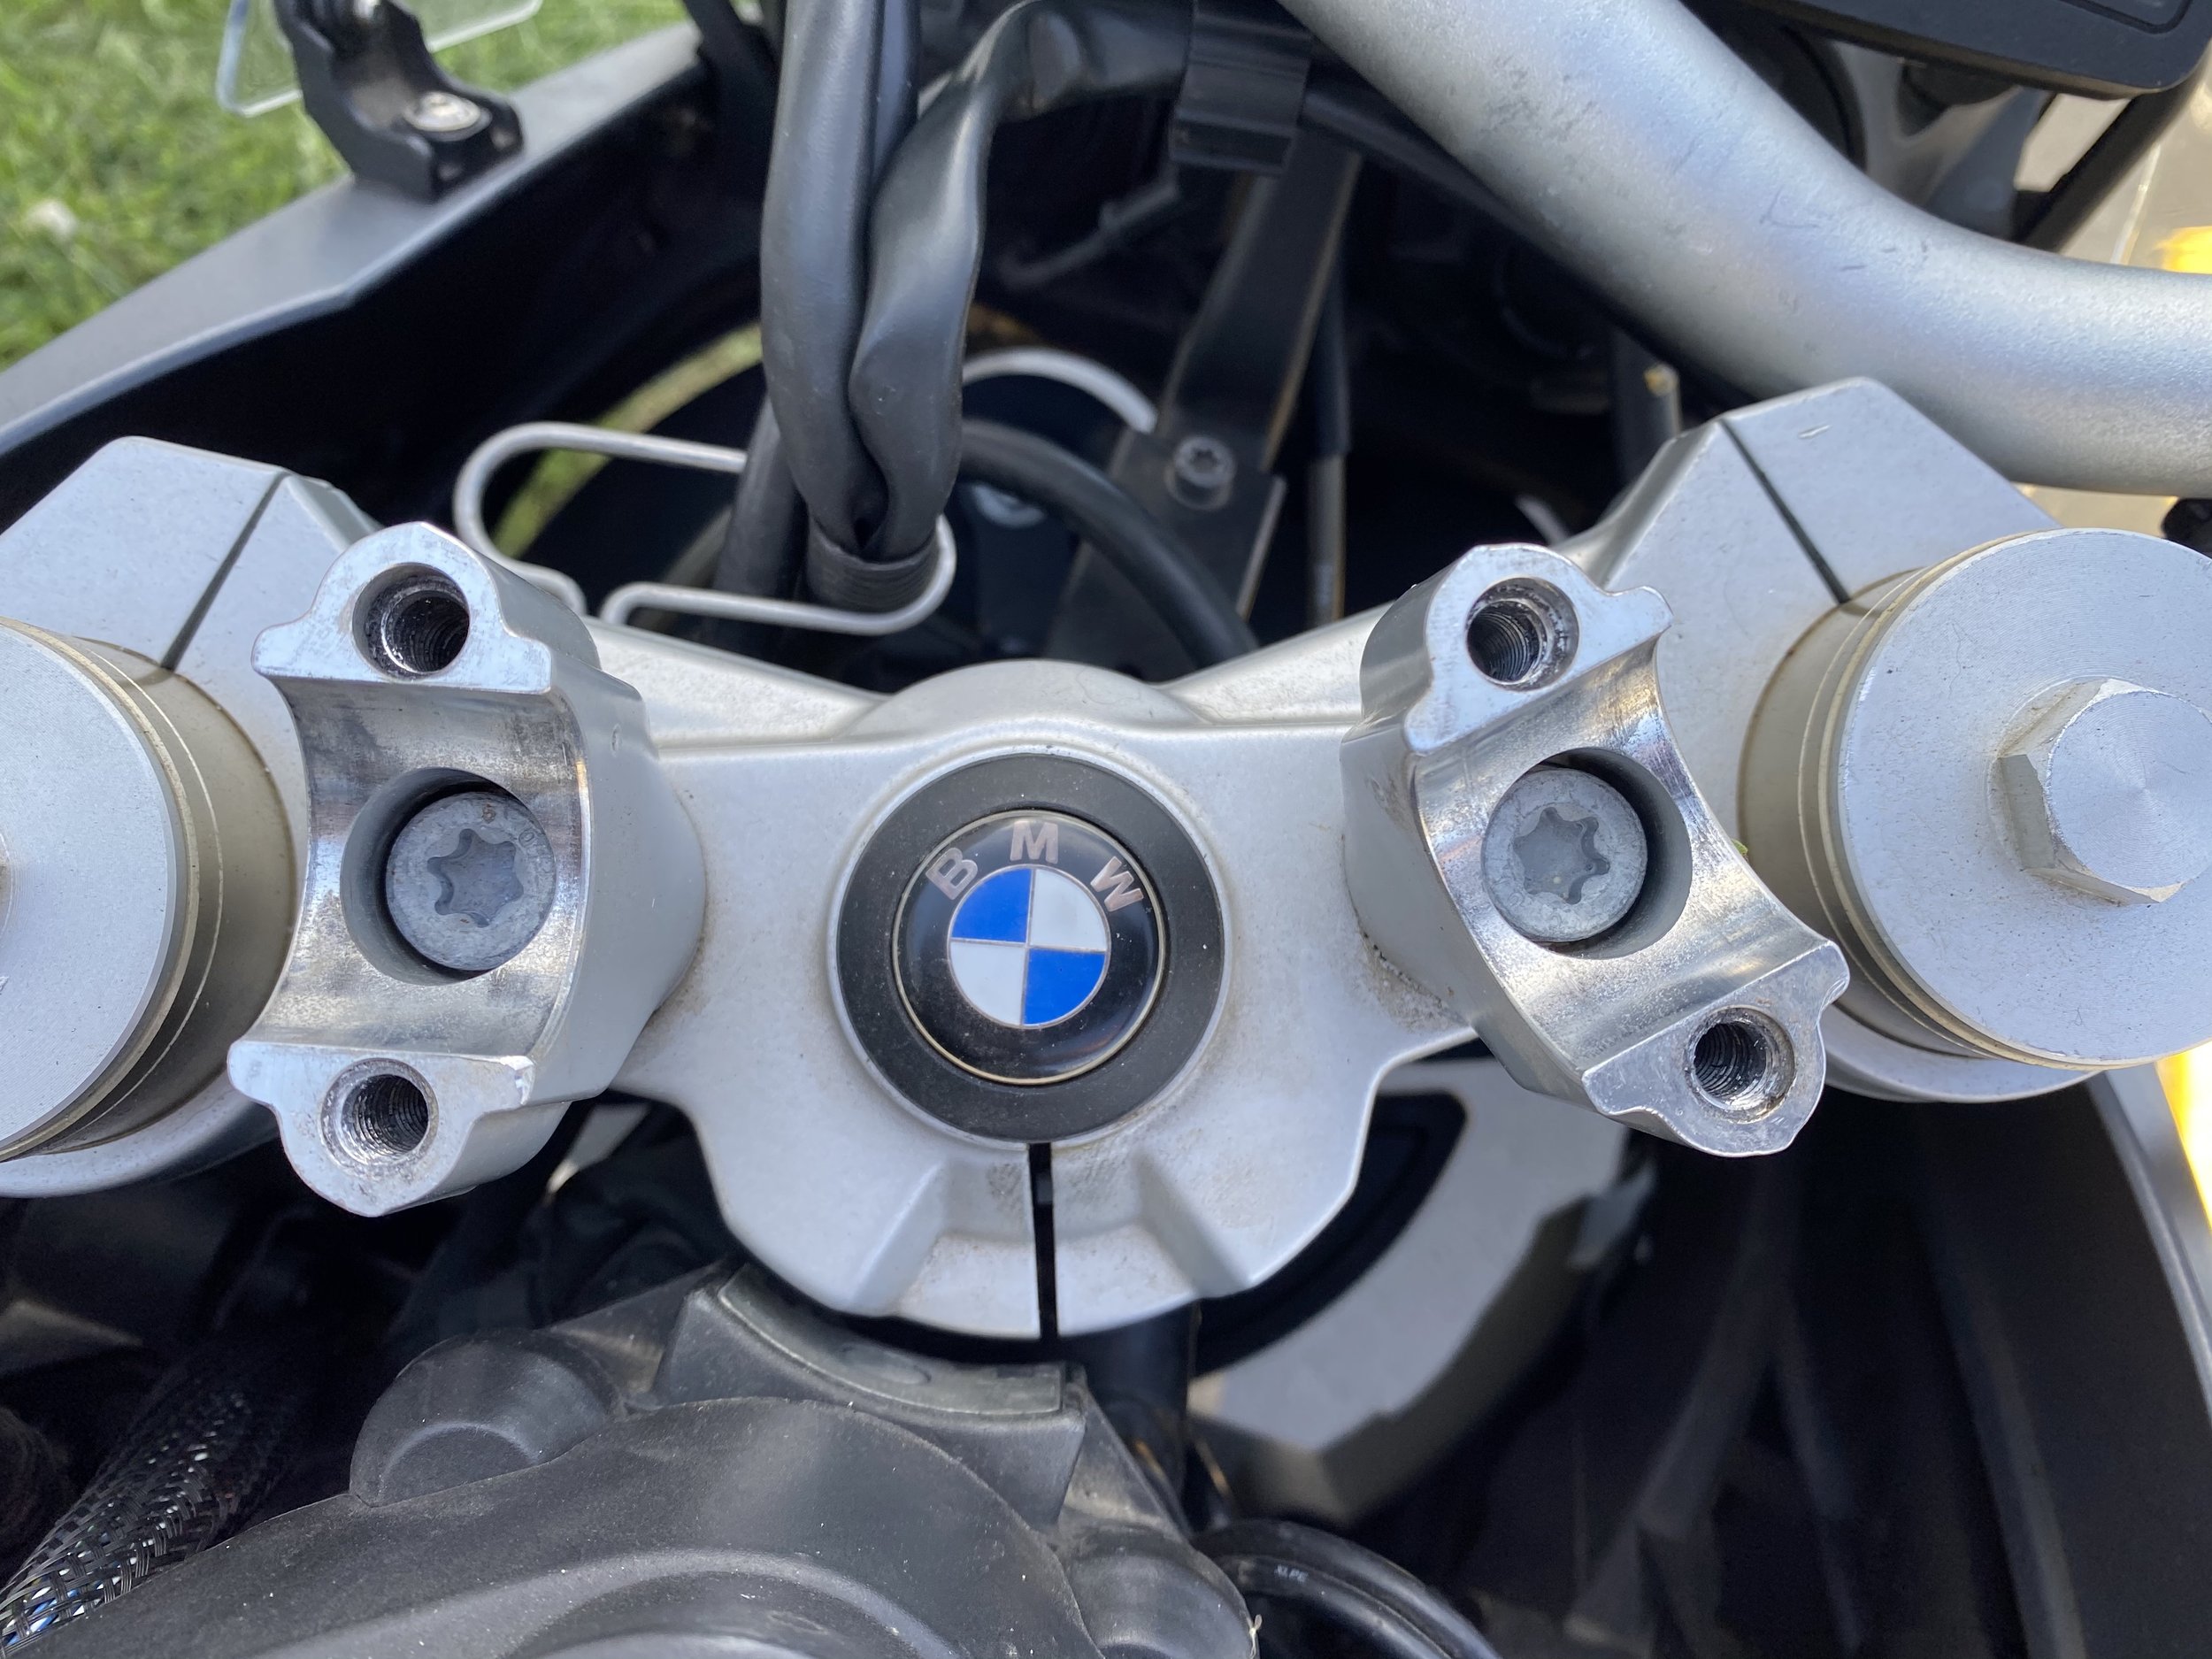
Bolts hard to get to without the right tool.

Taking risers off.
Once I got to the start of the NEBDR, I rode the route on another borrowed bike because I didn’t want to chance going down on the 800GS, so I rode a 411c Himalayan instead. Remember, choices and consequences, I was already up to my neck in financials. After a week on the NEBDR, I made my way back to get my bike where it was being repaired at Bob’s BMW in Jessup, MD. This took additional time and gas money and got added to the pocketbook. Well, Covid is still going, I really didn’t have anywhere else to be and I got my bike back, so I chose to finish off the MABDR. Why not!? Yes, solo, but conditions were much improved and the MABDR is a super easy route for anyone who has some riding and survival skills for the “what ifs.” Adventure is in my blood and unless my body just won’t allow for it, I will carry on. Please, just remember, if you choose to ride solo and have any type of recovery situation, it is going to get real interesting if you are ill prepared. There could be serious consequences. I would not even consider doing such a ride off-road without the backcountry and medical experience that I was acquired over the past 30+ years. Get yourself an EnReach or something like it so you can communicate to your loved ones and in the event, you have a life-threatening experience, you can send out for a rescue. Please learn what a life-threatening experience is so you don’t waste resources on something like a broken leg. Know when a broken leg is life threatening and when it is not. Knowledge is power and the more we learn, the better and more responsible we will be as adventure riders.

The borrowed Himalayan.
All and all, it was a great trip and even though there were challenges along the way, I’m so grateful for the opportunities to ride the BDRs, to learn along the way and the great people I encountered and who helped me get through it all. Thank you to Marjorie and her husband for opening up their home in a time like Covid. Thank you to Lisa who was extremely trusting and loaned out a very expensive bike for 2 weeks. Thank you to Sue of Dirty for Good, who loaned me the Himalayan and a thank you to Bob’s BMW who got right onto my bike knowing I was traveling and needing my bike ASAP and of course, thanks to the universe who always seems to offer a hand when needed, like the shelter that I camped under during a thunderstorm.
Until the next adventure… Stay safe and make good choices!
What Does it Mean to Ride Responsibly?
Blog Post – March 2022
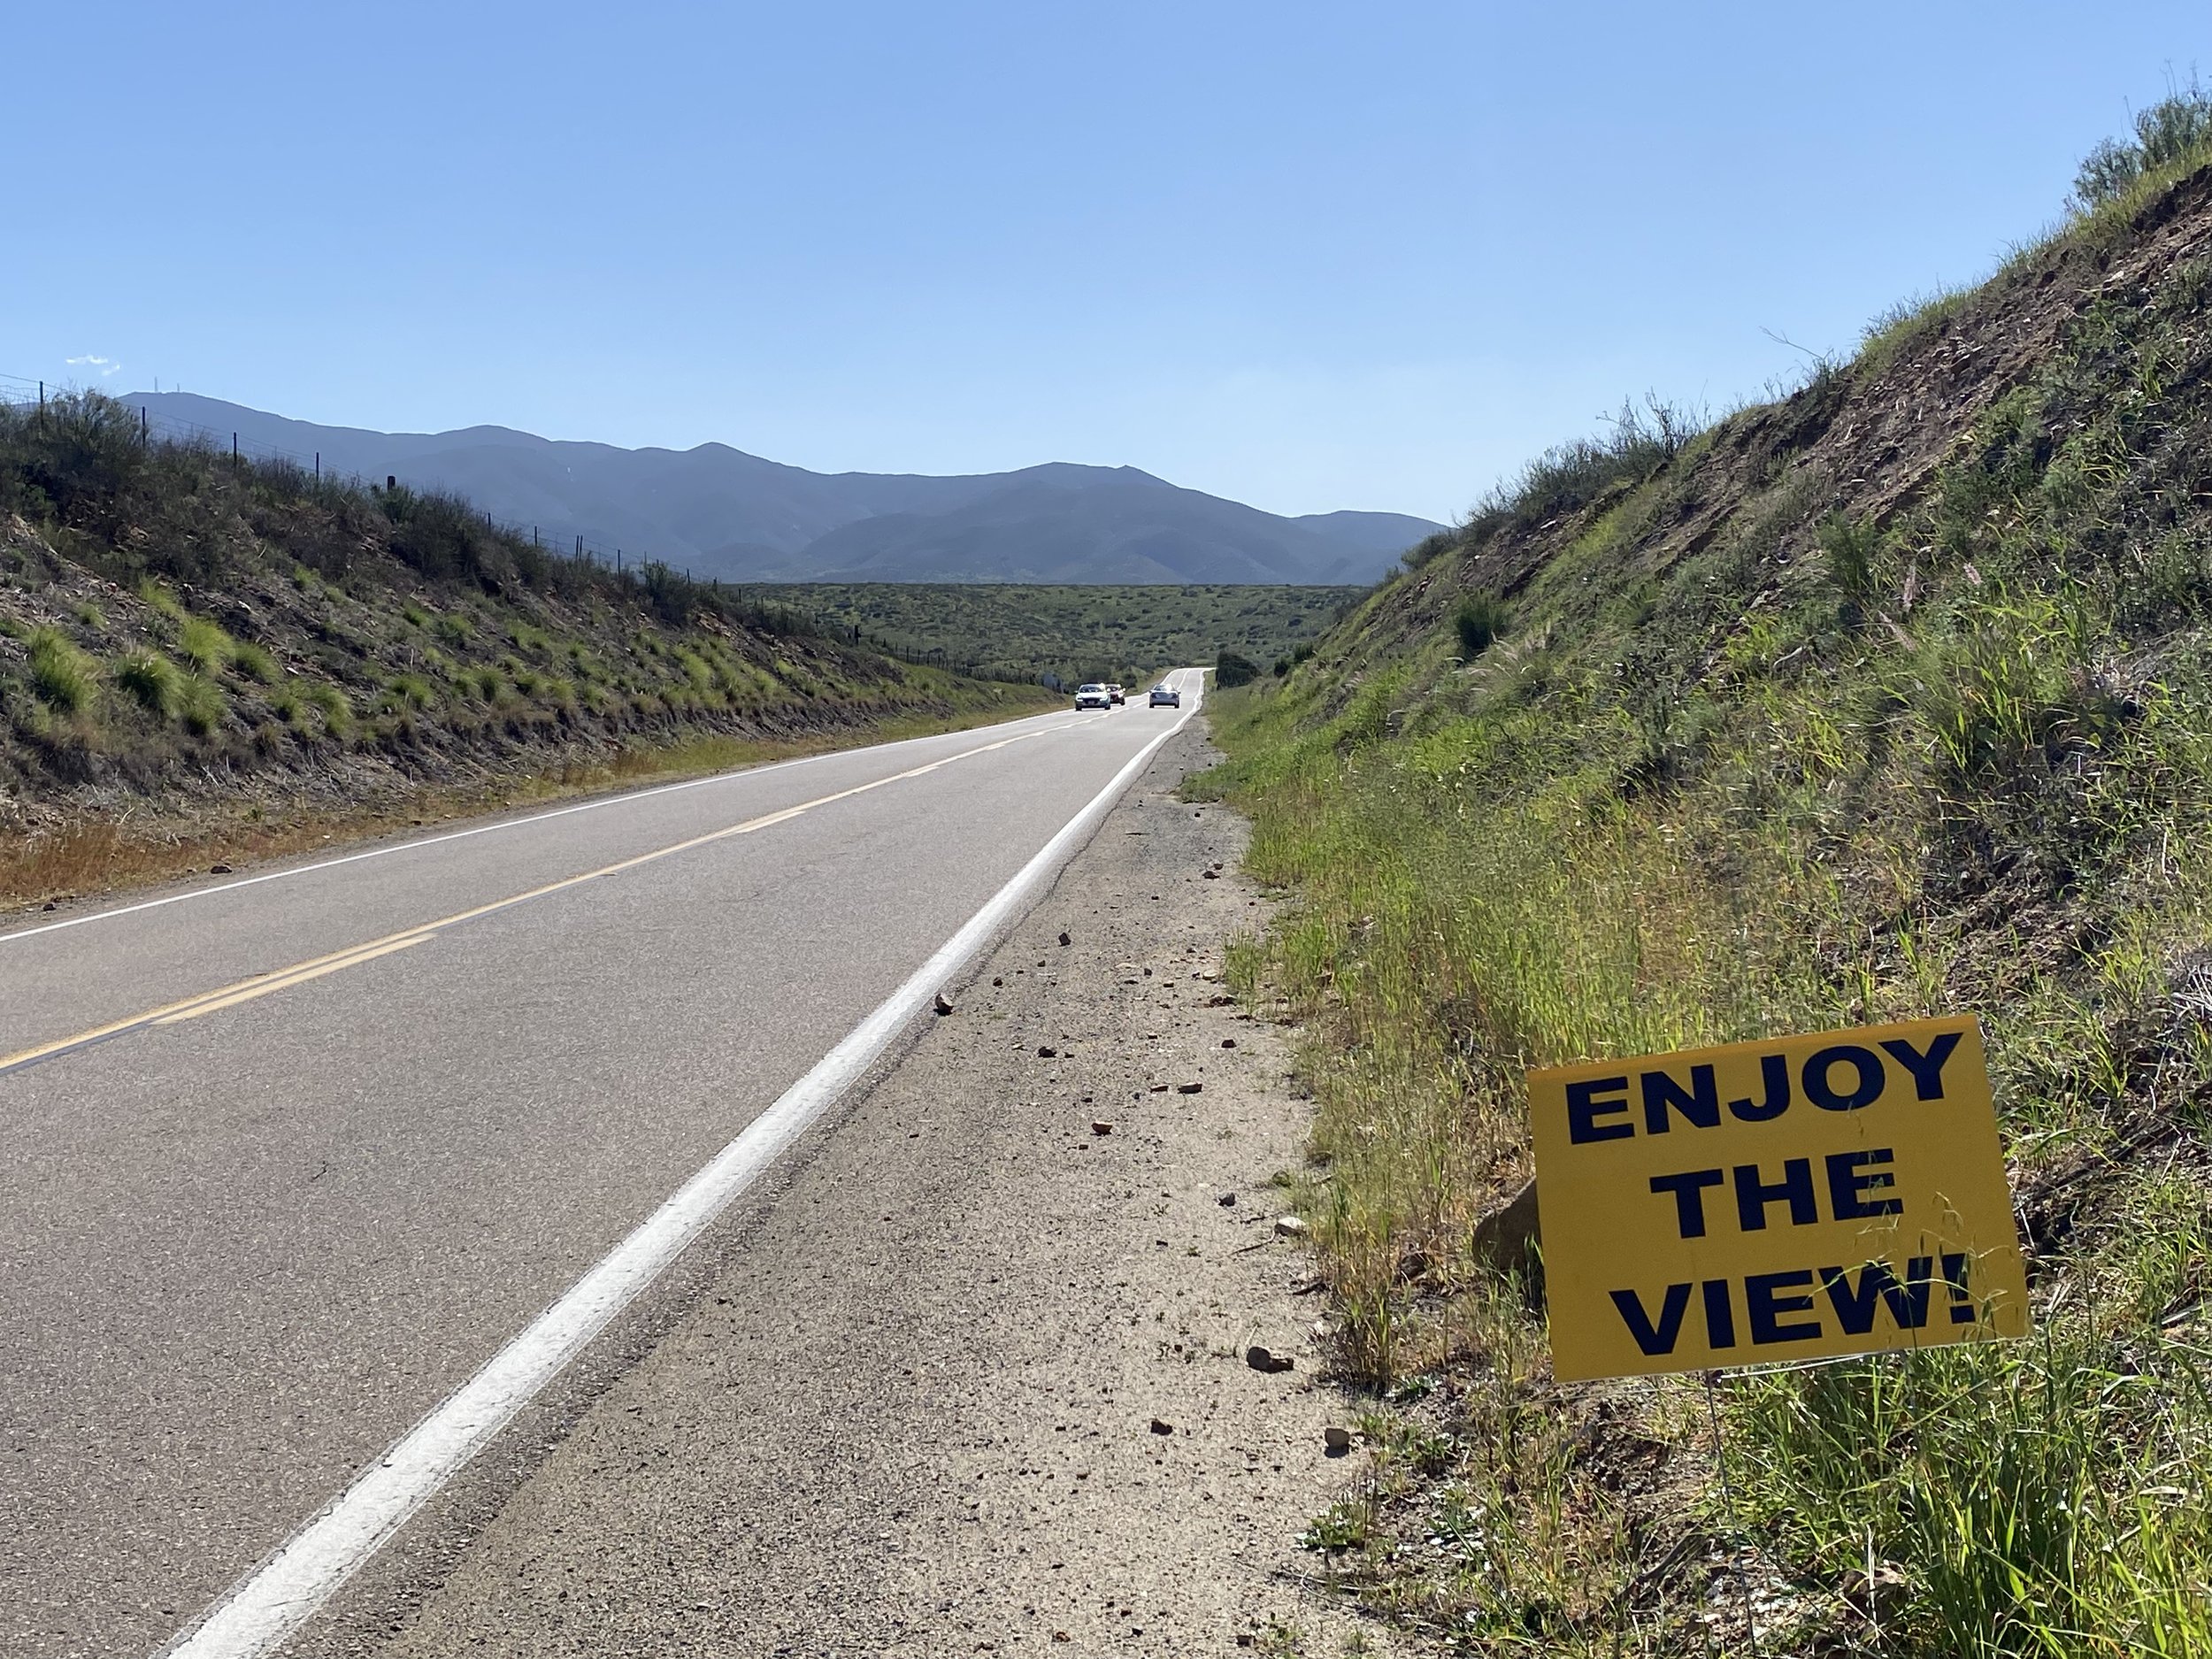
I was recently riding on another awesome Butler map route from San Bernardino to San Diego. Part of that route took me down into Warner Springs and at one point, I had pulled over to adjust my navigation and a car pulled up in front of me and the guy driving the car rolled down the window and said, “It’s so nice to see a responsible rider. Thank you. It is so rare to see riders riding responsibly.” I accepted his compliment, as it warmed my heart on one hand, but made my heart heavy on the other. He is right! It is so rare to see riders riding responsibly and with some knowledge about lane position and how to present their selves so they can see and be seen. Riding responsibly includes riding at or close to the posted speed signs which would allow riders to adjust for other roadway users, make lane adjustments and to have the time needed to see hazards and avoid them. Excessive speeds are a huge contributing factor for motorcycle crashes! As I continued to carve my way around the Mesa Grande Road, which, by the way, was very shaded and hid much of the roadway hazards like potholes and rocks and had very few speed signs to help me manage my speeds as I wondered my way down into Julian. So, I did as the Butler map suggested and that was to “..take it easy on the throttle…” However, most riders try and ride these types of roads as fast as they can because curves are one of the reasons we ride. They are super fun! However, statically speaking, most riders don’t realize they are 3800% more likely to die per mile ridden verses mile driven.* Adding excessive speed to the ride, especially in corners, is one of the main reasons that percentage is so high.

Road condition after heavy rains.
As a responsible rider and ambassador for this sport, I ride well within my skills and abilities each and every day I go for a ride. Unlike most riders, I don’t ride on the higher side of my skill set. I want to make sure that in the event something goes wrong, I have more skills available to help me get out of a sketchy situation. Most riders ride on the high side to their skill set or push the limits of traction most of the time and then they don’t have any reserve to help them get out of a sketchy situation. They are almost always pushing the speeds through corners, using up all their traction possible because they are riding so fast that it takes all their traction to keep them on the road. If they need to swerve or counter steer even more because their speeds were way too fast for a given corner, they don’t have any more traction available and that’s often when there is a crash. Many riders have ineffective counter steering abilities that contributes to the 3800% more likely to die numbers. A responsible rider always rides to the conditions of the roads and use the roadway signs to help gauge their speeds going into corners. The signs are there to help reduce incidents and to help roadway users be more safe. Can I go faster than the road sign says? Yes! But it doesn’t mean I should and as a responsible rider, I don’t! Riding responsibly also means to have the discipline to not push the limits. I am constantly asking myself, “Can I get stopped in the sight that I can SEE or can I make a lane adjustment if need be,” and if the answer is no, I slow down before I get into a corner. We, as riders, need to choose to ride responsibly to manage the high risk to motorcycle riding. I’ll say it again, “I don’t think riders realize that they are statically 3800% more likely to die per mile ridden verses mile driven.” We HAVE TO manage those risks down to an acceptable level to survive this sport. Choosing to ride within a rider’s skill set, traction limits, condition limits and the bike’s limits all play a role in managing the risks and surviving this sport.

Always have more skills in your tool box then the risks you are willing to take.
All too often I hear of other riders, and many of them being friends, who have had some kind of crash and much of the time, they blame the bike or the conditions. Recently, a friend went down at highway speeds on the pavement going into a corner when he hit some diesel. Of course, the reason for the crash was blamed on the diesel on the road and the type of tire he was running with on the front. I don’t know if the rider considered their part they played in the crash. It’s never just one thing that causes a crash, it is usually several things. The rider’s speed and/or inattention to the roadway conditions could have played a part. It’s possible, had the rider slowed down prior to the corner he could have seen the diesel spill and could have made a better lane position choice. It is also possible had the rider slowed down prior to the corner, he wouldn’t have had to lean so much into the corner and could have possibly glided over the diesel spill in a more upright position or maybe he could have gotten stopped prior to hitting the diesel spill all together. These are just a few things to consider.

You really don’t know what’s around the next corner.
Another friend of mine went down in a corner on the dirt and had no idea what happened. A very likely reason could have been that she counter steered (like you would on the street) into the corner instead of weighting the outside of the bike so if the bike slid out, she could have been in a better position to manage the bike sliding out. As responsible riders, we need to figure out what we did wrong and fix it. Don’t keep making the same mistakes. Don’t just shrug it off because the next time you might not walk away from it. We need to understand how our inputs effect the bike’s performance in different situations, as well as the differences between riding on dirt and riding on pavement.
Another experienced rider friend bought a new bike and crashed it several times in the parking lot and while on the trail and blamed it on the bike. Instead of him taking a little time to adjust to the new bike, he was trying to ride it like he had been riding his current bike. Riders need to take responsibility for their crashes and figure out what part they played in that crash. Statistically speaking, riders are 96% more likely to be the striking vehicle. That can include striking other vehicles, trees, guardrails, and any number of other things. That should tell you, we play a huge roll in our crashes. This friend ended up selling the new bike.
I’ve also witnessed a rider friend traveling at very high speeds on less-than-ideal traction surfaces, as in a dirt road with patches of snotty mud. When riders are going 60+ MPH on dirt roads that have varied traction throughout, they really need to scrub the speed down so when they see the color changes, they are able to slow to a subtle speed for the varied and highly slippery surface. These kinds of speeds are also a bit crazy unless your view is wide open and there aren’t trees and other things blocking your view from scanning for wildlife. My friend was not able to scrub his speed down and if he did, he still crashed at a rather high speed. Fortunately, he was not injured. However, I guess because he wasn’t injured, he also did not adjust his speed for the rest of the duration of the ride. The things that make me go… hmmmmmm??
Don’t rely on PDL (Pure Dumb Luck), become a responsible rider by riding at the posted highway speeds, as well as speeds that allow you to manage varied terrain and getting stopped if need be when you’re in the backcountry. Being a responsible rider also includes continuing to learn more about this sport, practice the techniques taught in classes and know your limits, your bike’s limits, and the condition limits, so you can bring the high risks (I’ll say it yet again, riders are 3800% more likely to die per mile ridden verses mile driven) to this sport down to an acceptable level.
I share these blog posts as an on and off street instructor as well as someone who has learned the hard way and was lucky enough to survive a serious, near fatal, crash. I’m trying to share my knowledge and help YOU become a responsible, safer rider.
*Statistics used from the Beginner Rider Course for Total Control
Isn’t this why we ride? Take the speeds to the race track!
Some of the Differences Between Riding on the Street and Riding in the Dirt
Blog Post - February 2022
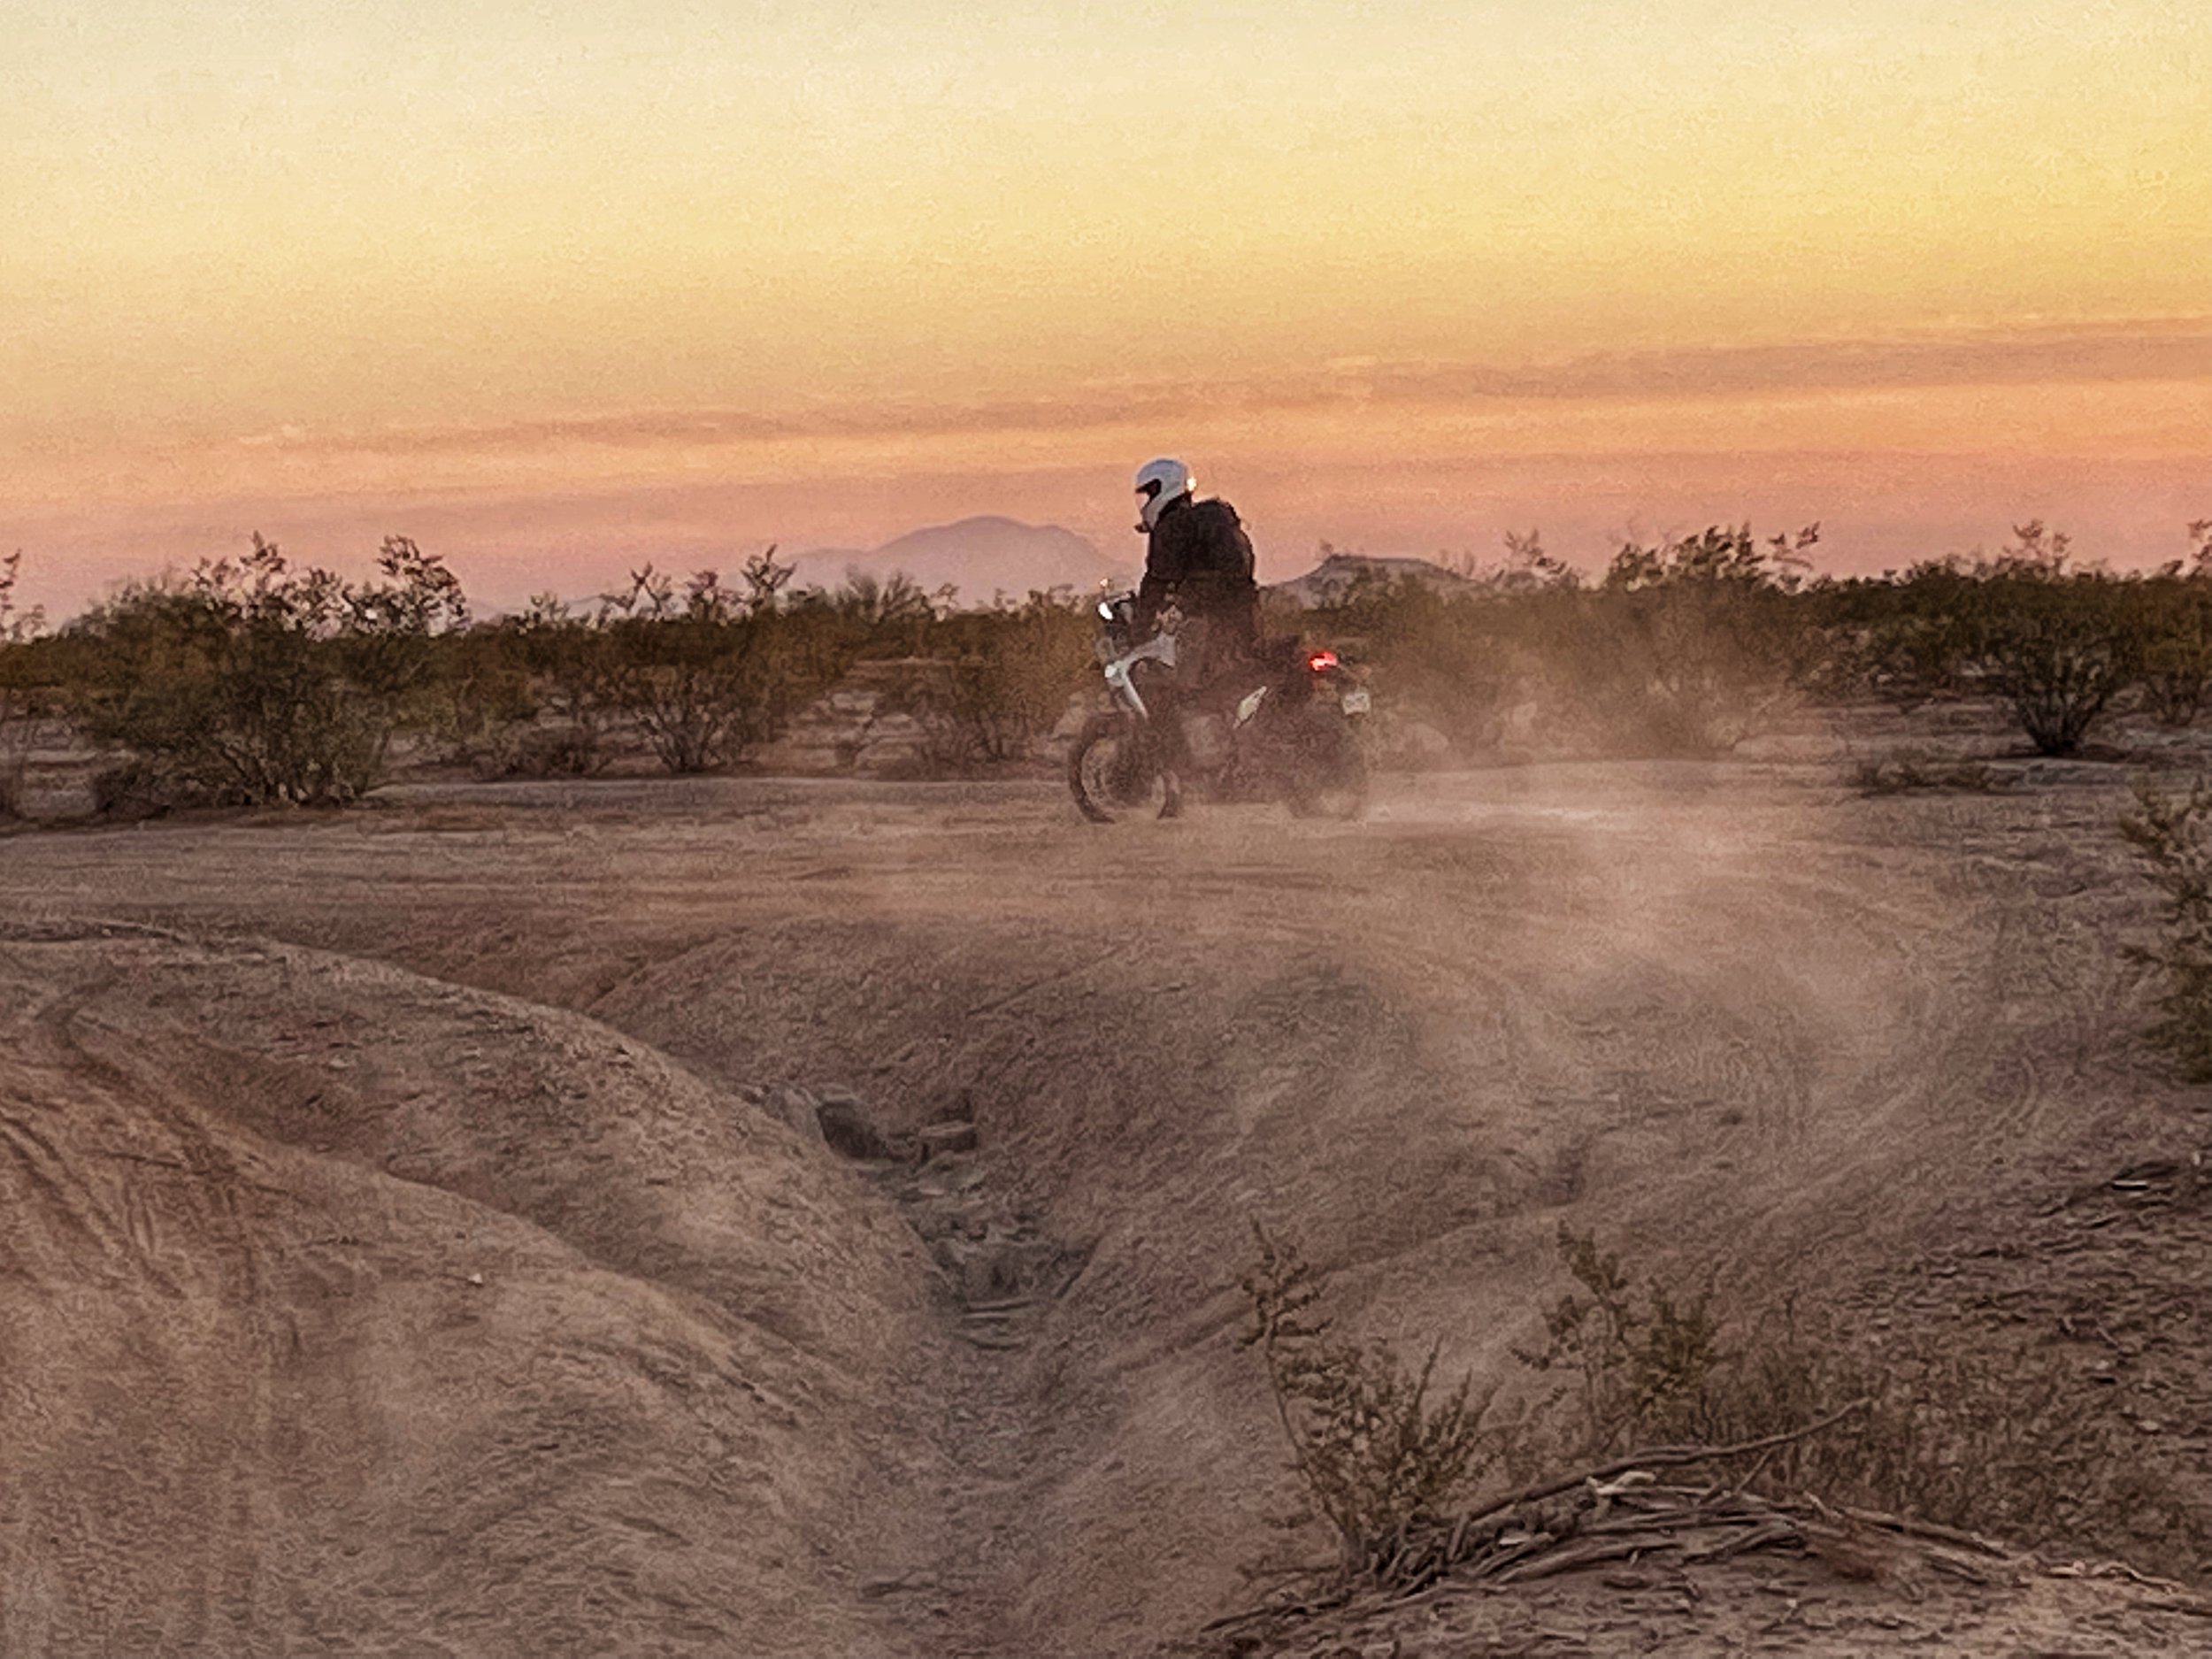
One of the main differences between street and dirt is the lack of traction. On dirt, we have a less likely hood of unwanted encounters with other roadway users, but we are operating on surfaces that are less than ideal. We can get into real trouble, really quickly, when we maneuver our bikes as though we have all the traction in the world. What we need to be considering is when we’re off road, we don’t have the stopping ability that we would have on the street. When we are on the street going 35 MPH and all the sudden, we need to STOP, it is going to take about 157.5-210 feet to get stopped (35 x 1.5 =52.5 feet x sec 3-4 sec).* That is about 10-14 car lengths to get stopped! (Average car length being 15). Now, throw yourself on less-than-ideal road surfaces, like a gravel road with marble like rocks. How far do you think it’ll take you to get stopped now? You might be asking yourself why it would take 157.5-210 feet to get stopped at 35 MPH when you are on pavement. Total stopping distance includes four parts: One, you must see that there is a reason that you need to stop. Two, your eyes then communicate with your brain that you need to stop. Three, your brain then needs to communicate with your hands and feet that they need to work their magic on the controls and then finally, four, the brakes are applied and with any skill, you come to a stop in a reasonable distance. The first 3 steps all take roughly .7-1 sec per step to achieve, and the last step all depends on your ability to apply the brakes properly.

Photo taken on a MotoDiscovery Scouting Trip
With all this being said, when we are riding off road, there needs to be a switch that we flick so that we adjust the way we think and operate the motorcycle. There is an increase in total stopping distance when off road as well as a difference with cornering. When we are riding off road, we want to always be on top of the motorcycle (obviously), but what I mean is when we are cornering, we want to always be weighting the outside peg and pushing the bike into the corner and then leaning to the outside of the corner (counterweighting), whether it be slow speed (less than 15 MPH) or higher speeds 15+ MPH. The reason being, when we are cornering at higher speeds, off road, we don’t have the traction that we do when we are on the street, so we want to be on top of the bike, weighting the outside peg so that in the event our traction brakes lose, we are on top of the bike and the bike slides underneath us and we stay with the bike. If you counter steer the bike, like you do on the street and the bike slides out, you are going down with the bike before you even know what happened. Now, when we are on the street at higher speeds, we have a lot more the traction than when we are on the dirt, we do the opposite. We counter steer the bike by pushing forward on the bars, lean our bodies in and forward into the corner and then pushing the bike more upright, which increases your traction and ground clearance. You might be asking yourself why we wouldn’t want to just use the same technique whether we’re off road or on the street. When you are on the street and you push the bike down into the corner like you would on the dirt, you are giving up all your margin of safety and ground clearance. There is only so much traction available and if you push the bike down in the corner, you are using up all the traction available and giving yourself zero traction to manage all the other things you might encounter on the street. Things to consider are crowned roads, obstacles, surface conditions, weather and temperature, to name a few.
Continue taking more training and learn as much as you can in this awesome sport we call adventure riding.
Less traction environment
*Reference: https://policedriver.com/explanation-of-time/
Crashing at High Speeds, Traveling Thousands of Miles in the High Heat and Cold of Colds
By Shalmarie Wilson
What riding suit do you want to be in?

Article first featured in the Touratech Newsletter and Blog. April 19, 2021
Eight years ago, I did a lot of research into finding the “perfect” riding suit. I was looking for a suit that had a high level of protection, looked good, fit well and something that was going to keep me cool in hot weather and warm and dry when the weather gods wanted to put the smack down. Being an Alaskan girl for much of my life, the critical component for me was a suit that wasn’t too warm, especially since I like to ride off-road in the backcountry. I came across the Touratech Companero riding suit. I must have read and re-read about that suit a million times. I looked up all the product features and googled what Cordura and CE 2 meant. The price tag on the suit definitely made me pause, but after much research and debate, I decided to invest in myself and my safety and purchased the high-end riding suit.

I would say it was money well spent! I can remember taking my first ADV Training Camp in Roy, WA, when it was a scorching 85+ degrees out, with no shade. Reflecting back, I remember watching other riders shed their Gore-Tex suits just as fast as they could during breaks. I, on the other hand, remained quite comfortable in the mesh summer suit with the airy comfort airflow fabric and full CE level 2 armor. There are many other accounts of the supreme performance of the suit and one of them dates back to the punishing hot summer of 2015, where the temperatures would be well over 100 degrees. We were riding many of the Backcountry Discovery Routes (RideBDR.com) and I would often have to ride through some gnarly sections, park my bike and walk back to ride my partner’s bike over the terrain as well. Remember, I’m from Alaska and did not do well with heat. When they say, “Cordura Air is light-weight and delivers a high volume of air-flow through the suit to keep you comfortable on the bike,” they meant it. If there is a slight breeze, you are golden. Riding doesn’t happen without the intense cold weather conditions as well. The Companero suit is boom proof. When you are riding all day in excessive rainy conditions, you want a suit that is going to keep you dry. The Companero does just that and again, is well worth the money spent. It’s a versatill and comfortable suit for those who are putting in the miles.
Let’s talk protection… being a motorcycle safety instructor, protection is high on my list.The Companero suit delivered!After wearing the suit for over 3 years, with one of those years being that I wore it day in and day out for well over 31,000 miles in all kinds of conditions, I took the suit to the track.I was allowed to wear the suit at the track because the jacket and pants zip together making it not only safer and meeting track standards, but warmer in cooler temperatures.Thank goodness, I did!While going into a corner at high speed, another rider made a poor judgement decision and cut to my inside corner.Her back tire tapped my front and down I went.The bike was nothing but sparks, while I slide several feet to a stop.Because the suit was constructed from durable Cordura 500 base material with heavy-duty Cordura 2000 in key areas, my skin remained in-tact.The suit looked a bit scared, but it did its job and that was to protect ME! Many riders don’t realize that not all motorcycle gear will protect against the friction of a slide on pavement.Some riding gear will actually melt into your skin under such friction. The suit didn’t keep me from breaking some ribs, but not having to have skin grafts was a huge relief.By the way, I was also wearing the Touratech Companero Carbon Adventure Helmet and it, too, did its job!One of the questions the paramedics asked me was, “Did you hit your head?”I answered with a, “No.”One of the paramedics looked the helmet over and found a rather large area that had spidered out on impact.The helmet displaced the energy of the impact and saved my noggin.It did such a good job that I didn’t even know I hit my head.I had zero effects from that impact, no headache, no neck pain, nothing. Again, money well spent!

Features that I like about the Companero suit is that it is designed with a layering type of system, with a Gore-Tex Pro Shell that was designed to go on the outside where it belongs. While touring thousands of miles, I’d keep an eye on the clouds and assess whether it was going to rain or not. “Rains are coming!” I’d pull over, take out the outer shells and slip them over the mesh summer suit. The waterproof Gore-Tex over-pant is easy to put on even while wearing motorcycle boots because of a heavy-duty two-way zipper that opens all the way up to your hip. Boom! Done! Ready to ride again. Oh, but wait, I have to wait for my riding partner to take off their jacket, zip in the rain layer, zip in the warm layer and then put the jacket back on. But wait, there’s more waiting to be had, as they would then have to repeat the process with their pants. In that time, I would have made a few calls, had a snack and taken a quick cat nap. Not really, but it was crazy to watch the process. I loved that part about the suit! I loved the layering; it was so quick and easy. However, there are always pros and cons to everything. The con about the outer Gore-Tex shells is they take up a bit of very valuable space. When you’re living on the road for over a year, space is extremely tight.
Another feature I liked on the pants were the good-sized zippered pockets located just below the waistband and the over-sized cargo pocket on the Gore-Tex outer shell, giving me easy access to my wallet, keys or cell phone while seated on the bike. Both the mesh jacket and outer Gore-Tex shell had nice box shaped pockets as well. The jackets also have a generous pocket on the inside where I keep an extra key at all times. Another feather that was important to me was being visible. The Companero suit is built with reflective panels and woven reflective thread for increased visibility in low light on both the mesh and Gore-Tex outer shells for both the jacket and the pants.

Word on the street, Touratech has a new and improved Companero Suit, the “Companero Rambler.” Because Touratech takes the feedback from motorcycle travelers from around the world and have teamed up with Rev’It for this new and improved version, this should be the suit of all suits. I look forward to putting the Companero Rambler to the test with thousands of miles and lots of backcountry travel!

Adventure Women, Do You Know What the Benefits Are to Doing Situational Training and Tours, Especially Lead By Women?
By Shalmarie Wilson
When women are trying to learn a sport or are being led by men there is a bit of a disconnect. Men do not have the understanding of our challenges because they do not experience those challenges themselves. When women SEE other women doing things, they can relate better because there is an even playing ground. There is great value to having more female instructors and ride guides, as many female riders appreciate learning from a female instructor/guide, because of this same playing ground.
SheADV has a few situational trainings and tours scheduled for 2021. Events like Dirty for Good and the ADVWoman COBDR Situational Training Tours, we often start the event with 1-2 days of training and then we hit the trails. We find that training just prior to the multi-day tours are very beneficial for the riders and coaches alike. Riders get to freshen up on their skills, especially if they have not been practicing. And the coaches get to assess the riders prior to hitting the route. It is scientifically proven we lose 80% of what we learn if we do not practice it within 48 hours. Multi-day tours will uplevel skills several degrees.
Because many riders don’t practice throughout the year, it’s always great to have a coach right there while they run through some drills so they can have immediate feedback and get to correct or fine tune their skills with proper direction. When we don’t practice often, we tend to forget little details that could make all the difference in the world. Having a coach give that feedback is very valuable. The more you take training, the more you can add to your skills toolbox. Remember, skills are perishable, so you still need to practice after the training and practice often.

Photo shared by ADVWoman
So, if you ever get the opportunity to do an event such as Dirty for Good or the ADVWoman Situational Training and Tours, I, along with many riders who have participated in such tours, highly recommend doing it. You get 1-2 days of training to work on the skills and practice in a closed-circuit area and then you get to take that information right away into a multi-day tour where everything is reinforced often.
I love this bit on female support, that I came across from #LeanInTogether, “Women accomplish amazing things when we support each other. When a woman helps another woman, they both benefit. And when women celebrate one another’s accomplishments, we’re all lifted up. Together women can do more, go further, and change the world.”
If you would like to read a participant’s own account of a 5-day backcountry situational training tour visit: My SheADVenture
If you are interested in setting up your own personal or small group situational training and/or tour, visit shalwilson.com

Blog post - February 2021
The story behind the buckle…
Back in 2011, just 3 years prior to departing for a motorcycle trip of a lifetime, I was in a near fatal motorcycle accident. With 7 orthopedic surgeries, months of trying to regain the use of my left arm, having short-term memory loss and suffering from PTSD, I was looking for something to help find the strength and determination to do such an awesome extended trip. I was still very weak and had chronic pain throughout my injuries, not to mention, I had severely sprained one of my knees while taking a dirt bike training class just prior to the trip. As I was looking for inspiration, I came across the Wonder Woman belt buckle. Perfect! I loved the idea of putting on a belt and clasping the buckle in place as I got ready for another adventurous day. That was back in 2014 and to this day, I still have the buckle and wear it for all my moto adventures. That buckle ended up being the inspiration and FUN behind my riding adventures, and also the inspiration behind the SheADV Power Shield logo!

The buckle has become a great conversational piece during my adventure rider training classes as well. Super FUN!
We all have the spirit for survival and adventure. Some of us, choose to pursue that spirit. Today, I find myself “broken” once again. I guess I prefer to look at it as challenged, instead of broken, so I’ll change that word. I am suffering from the recovery of a broken fibula and worse than that, a completely dislocated ankle back in October of 2020. It brings much pain and discomfort, but I am determined to NOT let it break me! Just like back in 2014, when I was setting off for a motorcycle trip of a lifetime, I’m challenging myself to overcome the discomfort by embracing it and doing the things that I CAN do. By the way, that motorcycle trip turned out to be 15 months of the most amazing experiences and I will forever be grateful for that opportunity.
Hospital in Oklahoma October 2020
While I work on my fitness, I choose the exercises that I CAN do. The ones that bring more challenge, I do what I CAN even if that is holding a plank for a whopping 15 secs. By the way, I’m up to holding those suckers for 90 seconds now! I can’t mountain bike for 4+ hours on rough, challenging terrain quite yet, but I CAN ride an easy, less tricky trail for 20 minutes. So, that is what I will do and before I know it, I will be concurring the more ambitious routes. Overall, I am increasing my fitness level, and if the truth would be known, probably in better shape than most. I share this with you all, in hopes that it encourages YOU to start living YOUR dreams and to not let the “challenges” stop you. Your challenges might look different than mine. What is keeping you from living out your dreams? Make a list. Now, look at the list and ask yourself, “What CAN I be doing NOW that would be taking me in the direction of my dreams?” Start taking those steps, even if they are baby steps. Before you know it, you WILL be living your dreams! Find yourself some inspiration and have a reminder, whether it be through a belt buckle, a sticker on the inside of your wind screen or a note to yourself that you see every day in the mirror and “Redline your life, by living it to the fullest!”
I wish you all the success in the world!
Shal
Off-road Training for a Post-Round-the-World Rider—What I Wish I Knew Before I Left
Heather Lea / June 7th, 2021

I’ll admit that after 708 days riding around the world, my first thought was, what could I possibly learn in a Level 1 off-road course? I’d spent two years swerving around stray dogs and potholes, hopping my fully loaded F 800 GS up mountain roads, and throttling through countless creek crossings—what would weaving between orange cones teach me now? Deep down, I knew I could be a stronger off-roader, but I’ve always been the kind of person who preferred to learn “on the job.” I figured with practice, I’d get better.
While traveling, I’d honed my riding skills daily, but after returning home, I was only going out a few times a year to ride BDRs or gallivant around town on pavement doing errands. My dirt skills would not improve this way, so in May—three and a half years after I got back from traveling—I signed up for SheADV’s Level 1/2 off-road course, endorsed by Dragoo Adventure Rider Training.
One aspect that attracted me to this course was that, if nothing else, I might meet other riders. The style of riding I enjoy is not conducive to meeting female riding partners. Why is that? It’s not because we can’t touch the ground with both toes or that ADV riding is “hard”—five-foot-one Jocelin Snow proves all of that wrong. And let’s not forget there are short male riders, too.
No, one of my biggest struggles as an ADV rider is I’m surrounded by men—namely, my husband and his friends. This usually leaves me feeling like I’m in over my head. Off-highway moto exploring, however, is one of my favorite things to do; that’s why I learned to ride in the first place, even if ADV riding sometimes makes me nervous.
I love my husband, and we’ve had some incredible experiences together on two wheels, but I’ve always wondered: would I ride better in a patient, supportive environment specific to learning? One where dropping my bike several times a day is okay and even expected? Or where I could try a challenging section over and over, instead of just praying to get through it?

I loved the idea of meeting other female ADV riders at a training course.
On a sunny May morning, I loaded my F 800 GS and left my home in Bellingham, Washington, en route to Monmouth, Oregon, where the training was happening.
“I’m going to ride motorcycles in the dirt,” I said to my husband. “Water the garden while I’m gone, please!”
It was the first time in our seven years together that I was the one going off on a motorcycle trip instead of or without Dave. That thought alone put an extra twist in my throttle and a smile (or was it a smirk?) on my face. For the next five days, I’d travel at my own pace and make my own choices.
When I arrived in Monmouth later that evening, I found where the course was being held, noticing tents set up on either side of a short gravel road. Doing a quick scan of the area, I thought, Where’s the training ground? This looks too easy. I turned onto a large grassy area where three people sat by tents and waved to me in welcome. The uneven, lumpy ground caught me off guard and I bounced over to a flat spot for my tent, hoping I wasn’t about to crater my bike in front of everyone.

Camping at the training course kept this trip economical.
After setting up camp, I wandered to the main area to meet the other 13 participants. There was a father-daughter team, a father-daughter-husband team, and another man who’d joined a female friend. The rest were all women on big bikes. I was relieved to see I wasn’t the only one with a heavy steed.
Day 1
In the morning, I saw the training course being set up on the bumpy, off-camber hill I’d almost dropped my bike on upon entry. In fact, I had dropped it when I tried to move it closer to my tent. This wouldn’t be easy ground to ride over. Throw in tight cornering and slow speeds, and things were about to get interesting.

SheADV instructor, Shalmarie Wilson, setting up the course.

A common occurrence on the lumpy ground.
Our highly accomplished, knowledgeable instructor, Shalmarie Wilson, laid out the first task of the morning: Simon Says. We followed her skilled assistant, Kris Fant, in circles going uphill at slow speeds while putting a left hand on our heads and hooking a foot behind us on our seats. This was tricky! My friction zone—that sweet-spot management of the clutch and throttle—wanted to stall and send me sprawling a few times.

Instructor, Shalmarie Wilson of shalwilson.com
Next, we had to weave up and down the hill between tightly spaced pylons while also dabbing a foot down at each one—without falling or stalling. If that doesn’t sound tough enough, try doing it while standing on the pegs.

The stop-and-start section.
These exercises and others were for discovering the balancing point of our bikes and how to gain control in nonideal circumstances. Flicking up kickstands, we were asked to take one finger—two at most—to balance the bike while walking in a circle. A few bikes toppled over, giving us opportunities to try out the Monkey Lift, where one person grabs the handlebars and frame or rack, shoving their butt into the seat. Another gets hold of the frame or rack on the other side, stands on the rear wheel, then sits, cantilevering. This was a valuable skill for me to learn; although the Monkey Lift requires two people, I could now have a more active role in lifting my bike. Plus, the two-person technique would save energy if I was out with my husband or another riding partner where bike drops might be common. I’m able to pick up my GS, even fully loaded, but in terrain where the bike might go down more often, multiple solo re-rights were too exhausting.

One-finger balancing skill section. The orange strap on Shalmarie’s bike is a great method for ensuring your front wheel doesn’t ‘walk’ while on the center stand.

Besty and Deanna demonstrate the Moneky Lift.
Day 2
The training difficulty increased on the second day for Level 2. We practiced stopping on a steep, grassy hill by dumping the clutch (no brakes), using only our right foot and careful clutching to back the bike down to a flatter spot. My favorite part of this practice was learning how to wiggle the handlebars left, right, left, right in order to turn and straighten out the front wheel without too much effort.
Hard stops in gravel followed; here, we practiced skidding with control of the front wheel, managing the slide with proper braking and body positioning. On the same road section, we were instructed to take off without spinning the rear tire. I thought back to countless times on my RTW trip where this kind of control would have come in handy.

Shlamarie explains quick stops in gravel.

A great spot for carrying a tow rope.
One of the most noteworthy revelations I had that weekend, however, was learning what I was good at. If like me, you only take courses to educate yourself on what you don’t know, you’re doing yourself a disservice. Knowing where your strengths lie is just as important, and sometimes, we don’t give ourselves the opportunity to test this out. For example, I’d avoided riding to the porta potty as it meant doing a tight U-turn in gravel to get back. Instead, I walked the 200 meters or so. Not a big deal unless you’re well-hydrated in the 78°F heat and have to pee 10 times a day. After doing a series of tight cornering in a figure-eight sequence on the training ground, I discovered I was actually quite competent at making tight turns. I could’ve been riding up to the bathroom like all the cool kids all this time!

Tight cornering skills section

Oops. Even the experts need help sometimes. Shalmarie trying to bend her clutch back into place after hooking her riding boot and dropping the bike.
In another exercise, we stood beside our running bikes and, using the friction zone only, throttled them up the road, turning between two cones, where we had to rock them back and forth without using any brakes. I was sure I wouldn’t be able to reach the throttle with my short arms, but I could, which made me realize that using this method, I could load my GS onto a trailer.
If At First You Don’t Succeed
Attempting the same challenge over and over again is another advantage of being in a course. No one’s waiting impatiently when you don’t get it the first time and want to go back. You’re surrounded by participants who are all in the same boat, failing and trying again. And everyone’s more than happy to encourage you to take another shot on that scary uphill climb or the figure-eights that continue to wash out your rear tire.


Making repeated attempts helps you see yourself improve, all while there’s a certified instructor right there telling you what you’re doing or not doing and how you can make it easier.
I Wish I Knew That Before Riding Around the World
Taking the SheADV course helped me not be afraid of my bike and to understand what I was keeping myself from. The Monkey Lift would’ve saved Dave and me a ton of energy on what were already long, exhausting days during our travels. The balance point on my GS is clearer now, as well as my body positioning.

A participant shows good body positioning while cornering.
A key finding I wish I’d known before my long-distance travels was that my wrists have too much bend in them while sitting. I came back from that two-year ride with significant wrist problems that plague me to this day. Proper body positioning while standing and sitting was another course perk that could have saved me from joint pain.
You’ll Learn From Other Students, Too
One participant, Betsy, gets huge points for showing me how to get on and off a bike when you can’t put the kickstand down. Again, this would’ve saved me energy and frustration whenever I parked somewhere with too much angle, or for getting on a taller bike. It’s tougher when you have gear on the pillion seat, but it can still be done.
Recently, I got on and rode my husband’s Husqvarna 300 using this technique. Because it’s too tall for me to get a toe down, I’ve never even tried to get it off the side stand. Now I can.
I found the other students to be a wealth of information. A woman named Jenny is starting a motorcycle apparel business, which I’m excited about, having had a hard time finding gear to fit me. I learned about the Unrally. I found out I can buy moto skivvies for my sore butt. These gatherings are a great place to see what other riders use, like, and don’t like.

Evening discussions and getting to know the other riders was also an ideal time to learn more.
Would I Take Off-road Training Again?
Heck, yes. I left Monmouth with more confidence in my bike and myself as a rider, but that doesn’t mean I’m done. I still have a lot to learn, and I’d like to advance my skills on more difficult terrain.
I’ve already signed up for another one of Shalmarie’s courses coming up in September at the Touratech West Rally.
Will I see you there?


This article was previously posted in Expedition Portal.
ABOUT THE AUTHOR: Heather Lea
Heather Lea has traveled to over 60 countries, 40 of which were on a BMW F 800 GS during a 708-day round-the-world motorcycle adventure with now-husband, Dave Sears (Trip Blog: Riding Full Circle). Heather has been a freelance writer for over twenty-five years and a book and magazine editor for more than fifteen. Aside from Expedition Portal, her stories can be found in Overland Journal, Canadian Geographic, Kootenay Mountain Culture, and Canadian Alpine Journal. She loves doing anything in the backcountry, including backpacking, four-wheel-driving, ski touring, and climbing. Heather is a Canadian now living in Bellingham, WA. Find her on Instagram @writer_heather_lea or on Facebook @heatherleawriter.
DON’T BE THAT MOTORCYCLIST WHO DOESN’T MAKE IT HOME!
Blog Post - August 2021

Selfie on Alpine Loop, COBDR
I am just returning home safely from a 7-Day ADVWoman Women’s Only Dual Sport Tour. When I returned home, I learned that another motorcyclist wasn’t so lucky. They did not get to return home safely. There were 2 motorcyclists riding staggered and tight, just like many motorcyclists do, which by the way doesn’t make it smart or right, especially with all the distracted driving these days. The first motorcyclist was in the left side of the lane and the second rider was in the right side of the lane as they were riding staggered. A truck pulling a trailer drifted over the center line and because the motorcyclist did not move and held that position, the truck killed the motorcyclist instantly on impact! There was no time for that rider to do anything about the fact the truck drifted in his lane. There was no time and space. Because the other motorcyclist had a close following distance, they too, were involved in the accident but were not killed. I’m sure there will be injuries to overcome and an awful time with recovery, both physically and mentally. Since this has happened and well before hand, I can’t tell you how many riders I see every day riding the Russian Roulette Roadways.
As a motorcycle instructor for both street and dirt, I am always coaching. For street, one of the topics is where to be riding in the lane. There are 3 lane positions to choose from for any given situation. LP1, lane position 1 (left side of the lane, LP2 (middle of the lane) and LP3 (right side of the lane). LP1 is the “default” riding position as it presents riders better to oncoming traffic. Be aware that riding in LP3 position could invite other motorists in YOUR lane, but is a good position to ride when there is a line of traffic coming and people wanting to pass such oncoming traffic. Ride in your lane with purpose and know that you should move around in your lane for different situations.
With group riding, I encourage riders to ride their own ride and not necessarily in a tight, staggered group formation.One of the reasons being, the groups I lead are often varied in skill levels and the tour is often their first-time riding in a group. So, riding at their own pace makes sense. However, there are times when we are in a more staggered formation, usually at lower speeds, and that is where the lead rider is in the far left of the lane (LP1) and the next rider is in the right side of the lane (LP3) and so forth down the line.Because distracted driving is such a huge problem these days, I coach the riders to move from the left side of the lane to the middle or right side as oncoming traffic is approaching.This gives the riders time and space from the oncoming traffic. The riders following should then slow to build more time and space from the rider in front of them as needed.All it takes is for the oncoming driver to glance down for a second and they could be IN YOUR LANE. This happened to me on this last tour, and it was a scary situation, to say the least.Thank goodness, I was practicing what I teach.I was in the right side of the lane, mostly because I was approaching a corner that went to the left and being in the right side of the lane opened my view better and I could see oncoming traffic sooner.A large, white truck drifted over the center line and continued to do so for at least 2-3 seconds. That might not seem like a long time, but at 55 MPH, which was the speed I was at, a

Proper roadside etiquette, while riders take a roadside break.
person is traveling 82.5 feet per second (55 x 1.5 = 82.5 feet traveled per second). That is about 9 car lengths, PER SECOND! So, 2-3 seconds is a shit ton of time and distance traveled that the large, white truck was in MY LANE, approximately 250 feet, which is about 28 car lengths! You need to also consider that they too were probably going 55 MPH or faster as well, making a potential collision situation happen that much sooner. What happened next? I got on the brakes and activated my ABS (because it scared me). I’m not happy about that because getting into the ABS means I got on the brakes too abruptly and had I not had ABS, I would have gone into a skid, which is not a good thing and I will have to go back to practicing more on hard braking, as well as visualization. The driver finally got back on their side of the road. As he got back in his lane, I made a jester with my left hand basically saying (no, I did not flip them off, I just raised up my left hand), “Dude, what the frick? Stay present and stay in your lane! There are more motorcyclists behind me!” Well, guess what that prompted the driver to do… he threw a can out the window at me. Wow! Really!? Yep! The can missed me, of course, because of the travel distance I mentioned earlier, but it could have been a bad situation. So, the lesson in that for me was, don’t make jesters at other drivers no matter what I might be thinking. Stay focused and present on what I need to be doing as a safe motorcyclist.
It was pointed out to me later, that it was obvious who was riding in my group when that happen, as those riders from then on started moving over to the right side of the lane as oncoming traffic approached. I had been talking about moving in their lane and the potential of other motorists drifting in our line many times throughout the tour and no one really seemed to get it until they saw what happened with me. Why does it take an experience to get riders to start doing some of the things that coaches are trying to teach them? As a coach, I am curious about that. I want to be able to help other riders and telling them doesn’t seem to be enough.
Unfortunately, many riders learn the hard way and if they are lucky enough to live through it, they may or may not ever get back on a bike. So, how can we reach riders better? Any thoughts (and please, keep it positive and productive), send them to me at shalmariewilson@gmail.com.

A sticker I created to help remind riders.
As motorcyclists, we should always be riding with intension. We should be asking ourselves, “What’s next?” We should be very present with our riding and always planning. For a right-hand corner, swing to the left side of the lane to open your view so you can not only see if other traffic is coming but what the road surface is like or if there is a stopped dump truck in your lane. Left hand corner, swing to the right side of the lane. When riding in rolling hills and you’re peaking the crest of the hill, you should be either in the center of your lane or further right in case another vehicle is coming and they are drifting the center line or worst, in your lane. Rolling hills are basically vertical, blind corners. Give yourself some time and space from that other lane.
Consider when another motorist’s vision might be blocked by a telephone pole, building, tree or bush and present yourself by changing your line position. Intersections are where we have the most conflict with other vehicles. According to the National Highway Traffic Safety Administration (NHTS), 35% of collisions happen at intersections and according to the National Center for Statistics and Analyasis, 20% of those accidents result in the motorcyclist’s death. As you approach an intersection, roll off the throttle, SEE (search, evaluate, execute), plan for the “what ifs” and have a couple of escape options just in case. Motorists making a left-hand turn are especially dangerous for us as it has a high percentage of possibility, so when you SEE (search, evaluate, execute), a vehicle that is potentially going to be making a left-hand turn, anticipate that they don’t see you and have a plan. Roll off, weave in your lane to catch their eye and have an escape plan for the “what if.”
When you are on a multiple lane road, consider moving in a different lane, depending on the situation. Give yourself as much time and space from potential threats. When you see different road signs such as intersection signs, use them to navigate your lane position. The following are examples of where riders should be considering where to ride in their lane when they SEE (search, evaluate, execute) different road signs: (Screen shots from Google were taken of road signs to use for examples). According to NHTS, 76% of the motorcycles involved in fatal crashes were struck in the front. Only 7% were struck in the rear. By managing intersections, we can reduce the likely hood of having a collision. But, that requires your full attention, riding with purpose, intension and at speeds that you can manage in the event there is a potential hazard.

Imagine taken from a Google search
With this sign, consider the right side of the lane, not only so you can see the potential vehicle coming out onto the roadway sooner, but so they can see you a bit more readily as well. Remember, depending on the speed, you are traveling quite a bit of distance per second and giving yourself an extra second to SEE (search, evaluate, execute) and respond could be the difference between having an extra 82.5 feet (at 55 MPH) to respond or not.

Consider your lane position to be the left side of the lane. Again, for the same reasons as above. We should be moving in our lane often because of the forever changing situations. Move with intention!

For 4-way intersections, consider being in the middle of your lane to give yourself some room on either side. Weaving a bit in your lane might not be a bad idea. Movement catches people’s eye. We are not a threat to another motorist, and they are not looking for us. We must make ourselves more visible and movement can help with that. Even when you think a motorist is looking right at you; because of unintentional blindness, they may very well not see you. They are not thinking about motorcyclists, therefore, they look right through us, literally. Ride as though you are invisible. According to NHTS, in 2020 there were 2,741 fatal two-wheel crashes each involving a motorcycle and another type of vehicle. 42% of those crashes, the other vehicles were turning left while the motorcyclists were going straight, passing, or overtaking other vehicles.

Here again, consider getting over to the left side of your lane to open your view and present yourself to other motorists, especially if there is something potentially blocking the merging vehicles view. If there are multiple lanes, you might consider moving over into the next lane.

According to Fatality Analysis Reporting System (FARS), 92% of fatalities occurred on non-interstate roads compared to 8% on interstates. Intersections can be deadly! This is why we need to ride with an awareness at all times and think about presenting yourself so others have an opportunity to see you. For this example, you might consider being in the center of your lane to give room on either side of you. We also need to be going at speeds, which are also usually posted prior to most intersection signs, so that when another motorist is sitting at an intersection, looking both ways and then pull out, we aren’t going so fast that they end up pulling out in front of us. This happens ALL THE TIME and motorcyclists always blame the motorists who pulled out in front of them. Well, what speed where you going? If the other motorist looks both ways and it’s clear, so they pull out and then all the sudden YOU, the motorcyclist, is having to do life-saving maneuvers, YOU were going TOO FAST! Slow down and give other motorists an opportunity to see you.

As motorcyclists, we should realize that we don’t stop on a dime when we need to. We have to first SEE that we need to stop (which takes about a second), our eyes then need to communicate to our brain on what we need to do doing (which is another second), our brain needs to then communicate to our hands and feet to what they need to being doing (which is another second), and then the brakes need to do their job (which again is another second or so, depending on your braking skills, bikes capabilities, road surface and so on, which could all add up to more stopping distance). So, total stopping distance at 60 MPH, could take about 360 feet or more to get stopped. (60 x 1.5 x 4 = 360 total stopping distance at 60 MPH, which is over a football field in length).

Speed limit signs are super helpful for us to manage our stopping distance, especially around corners! You may very well have the riding capability to take a corner much faster than what is posted, but can you stop at the higher speeds if you had to? The answer to that in many cases is, NO, many (if not most) riders do not have the ability to stop at the speeds they are choosing to ride, or they simply miss the corner all together because they do not have the skills to manage the corner at the speed they are choosing to ride. It’s easy to twist the throttle, but there is a lot more to managing a motorcycle than to just twist the throttle. There is a lot more involved in stopping a motorcycle then stopping a vehicle. It takes a high level of skill and coordination using not only a foot, but also a hand, balance and a calm and very practiced ability to get stopped. Stopping in a corner is even more tricky as you have to be well practiced to get the bike in a straight line prior to applying any brakes or if you are more skilled and can apply just enough brakes while in the corner so that the bike doesn’t slide out and then as the bike straightens out, then really hammer on the brakes in a way that again, you don’t slide out. Are you currently practicing hard stops? The answer for most riders is, “No.” Training really does matter! Take some kind of motorcycle training course each year. You’ll always learn something and that something could be lifesaving. After such training, you really need to be practicing the skills taught. In the event of an emergency, you will revert to have you have been practicing and if you haven’t been practicing, you will panic and grab and stab the brakes in an unfavorable manner.
Riding with intention, means to be riding with purpose. Choosing a lane position for a reason and riding with awareness is riding with intention. Just like any other sport, riders need to be placing themselves for a reason. Football players play with purpose. They position themselves so that they can be successful within a play formation. Name any other sport and they are playing with reason, intention, and purpose. They practice the skills that they need to be successful, to make the sport more fun and to master their chosen sport. We, as motorcyclist, need to be doing the same things. This is a sport! It is not just for transportation. It is a seriously fun and exciting sport, and it does take us to some amazing places that we would never get to experience. It is also a seriously risky sport in survival! Don’t rely on PDL (pure dumb luck), manage the risk by training/practicing, asking yourself, “What’s next,” staying present, and having a plan.
Ride to Live Another Day

Ride YOUR Ride – Shal
If you’d like more information on the Traffic Safety Facts annual report, visit: www.crashstats.nhtsa.dot.gov